Page 1 of 12
make your own g88
Posted: Tue Oct 02, 2018 1:26 pm
by Vinyl-ant
I like the g88. I like it better than the 99, for no other reason than i think it looks better.
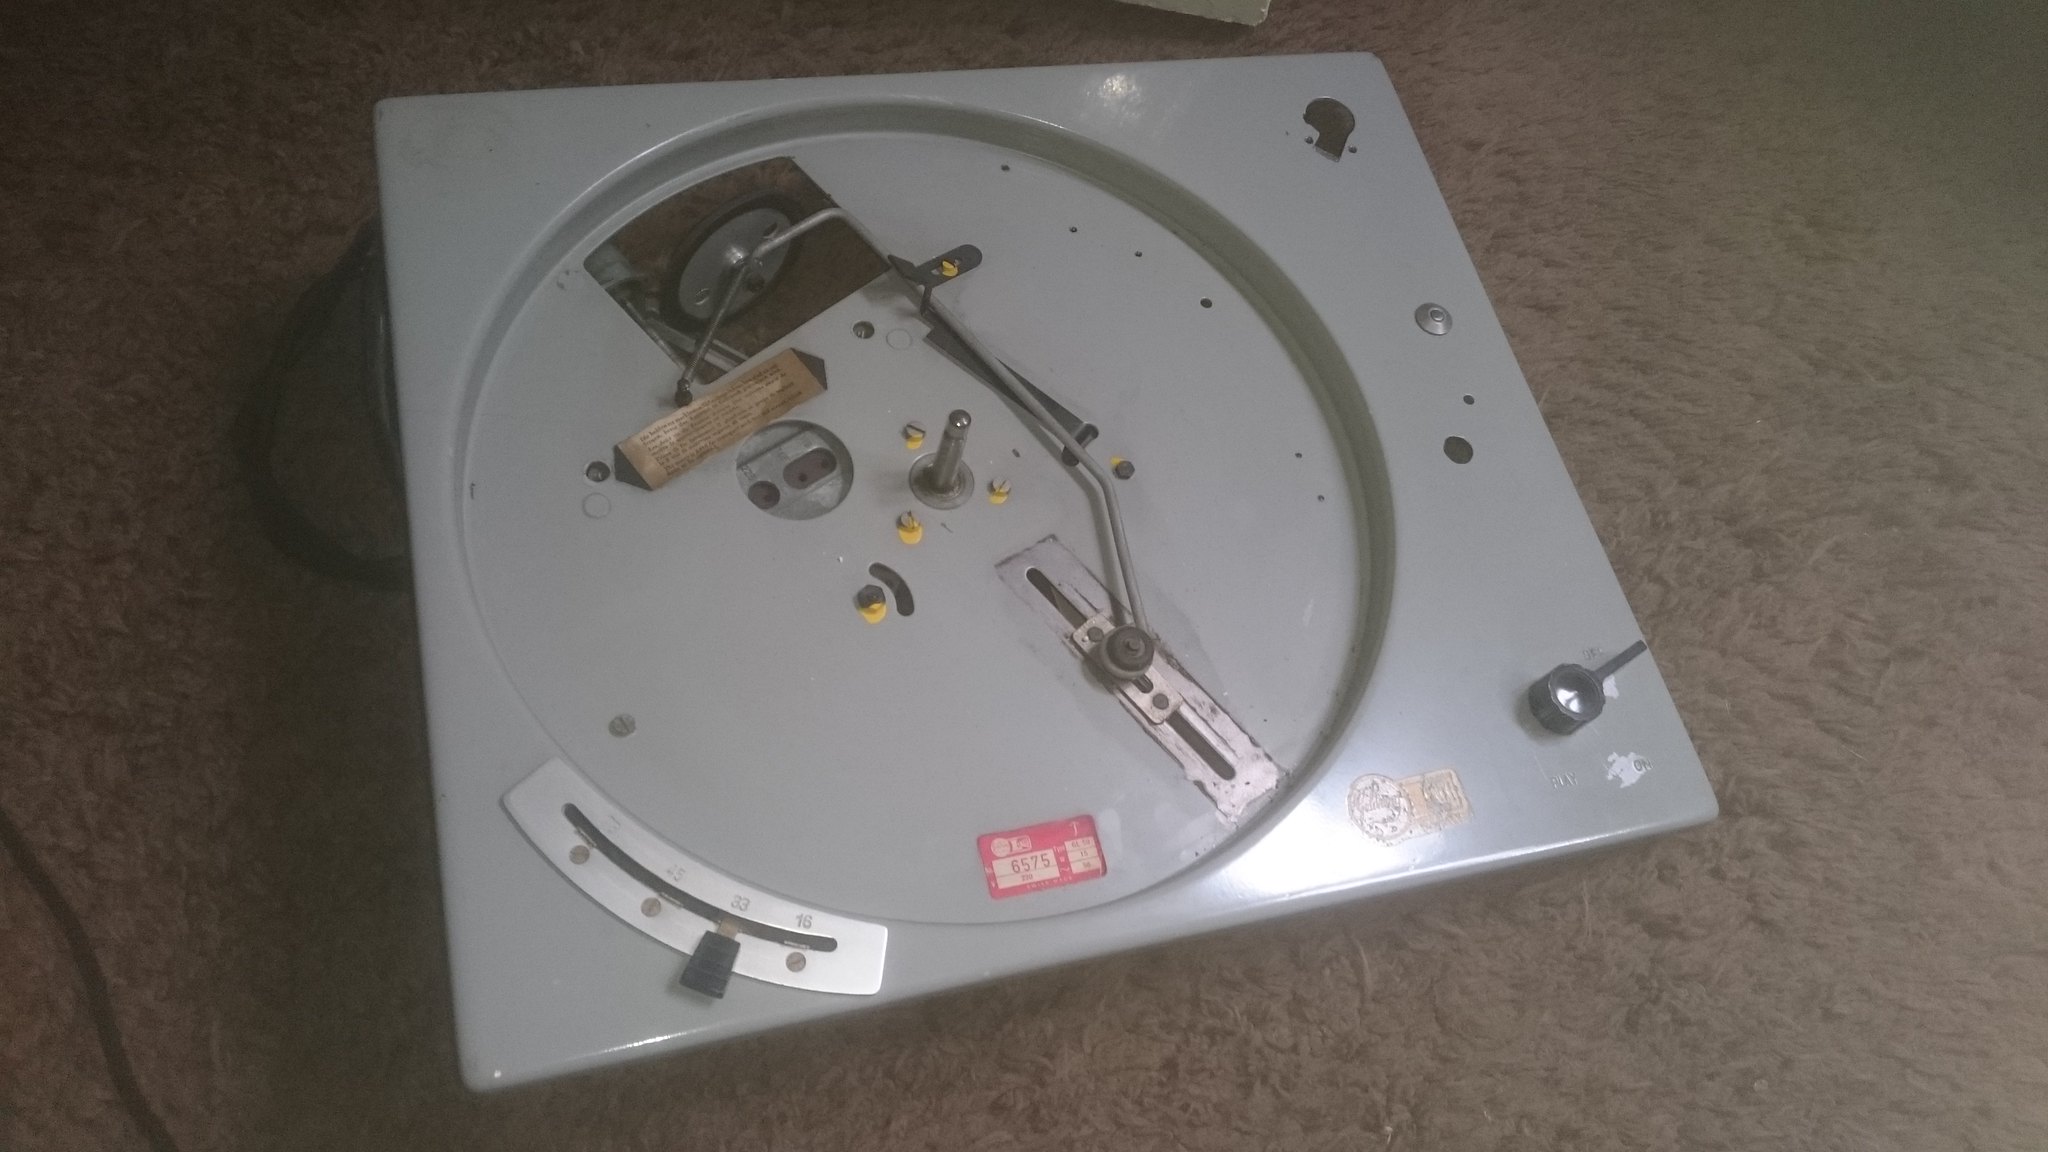
I can't afford an 88 or a 99, and have no real need for one, having my own lenco conversion wot I built as a demonstrator. But I did have a gl59 sat doing nothing in a box on top of the wardrobe. That I bought for no real reason.
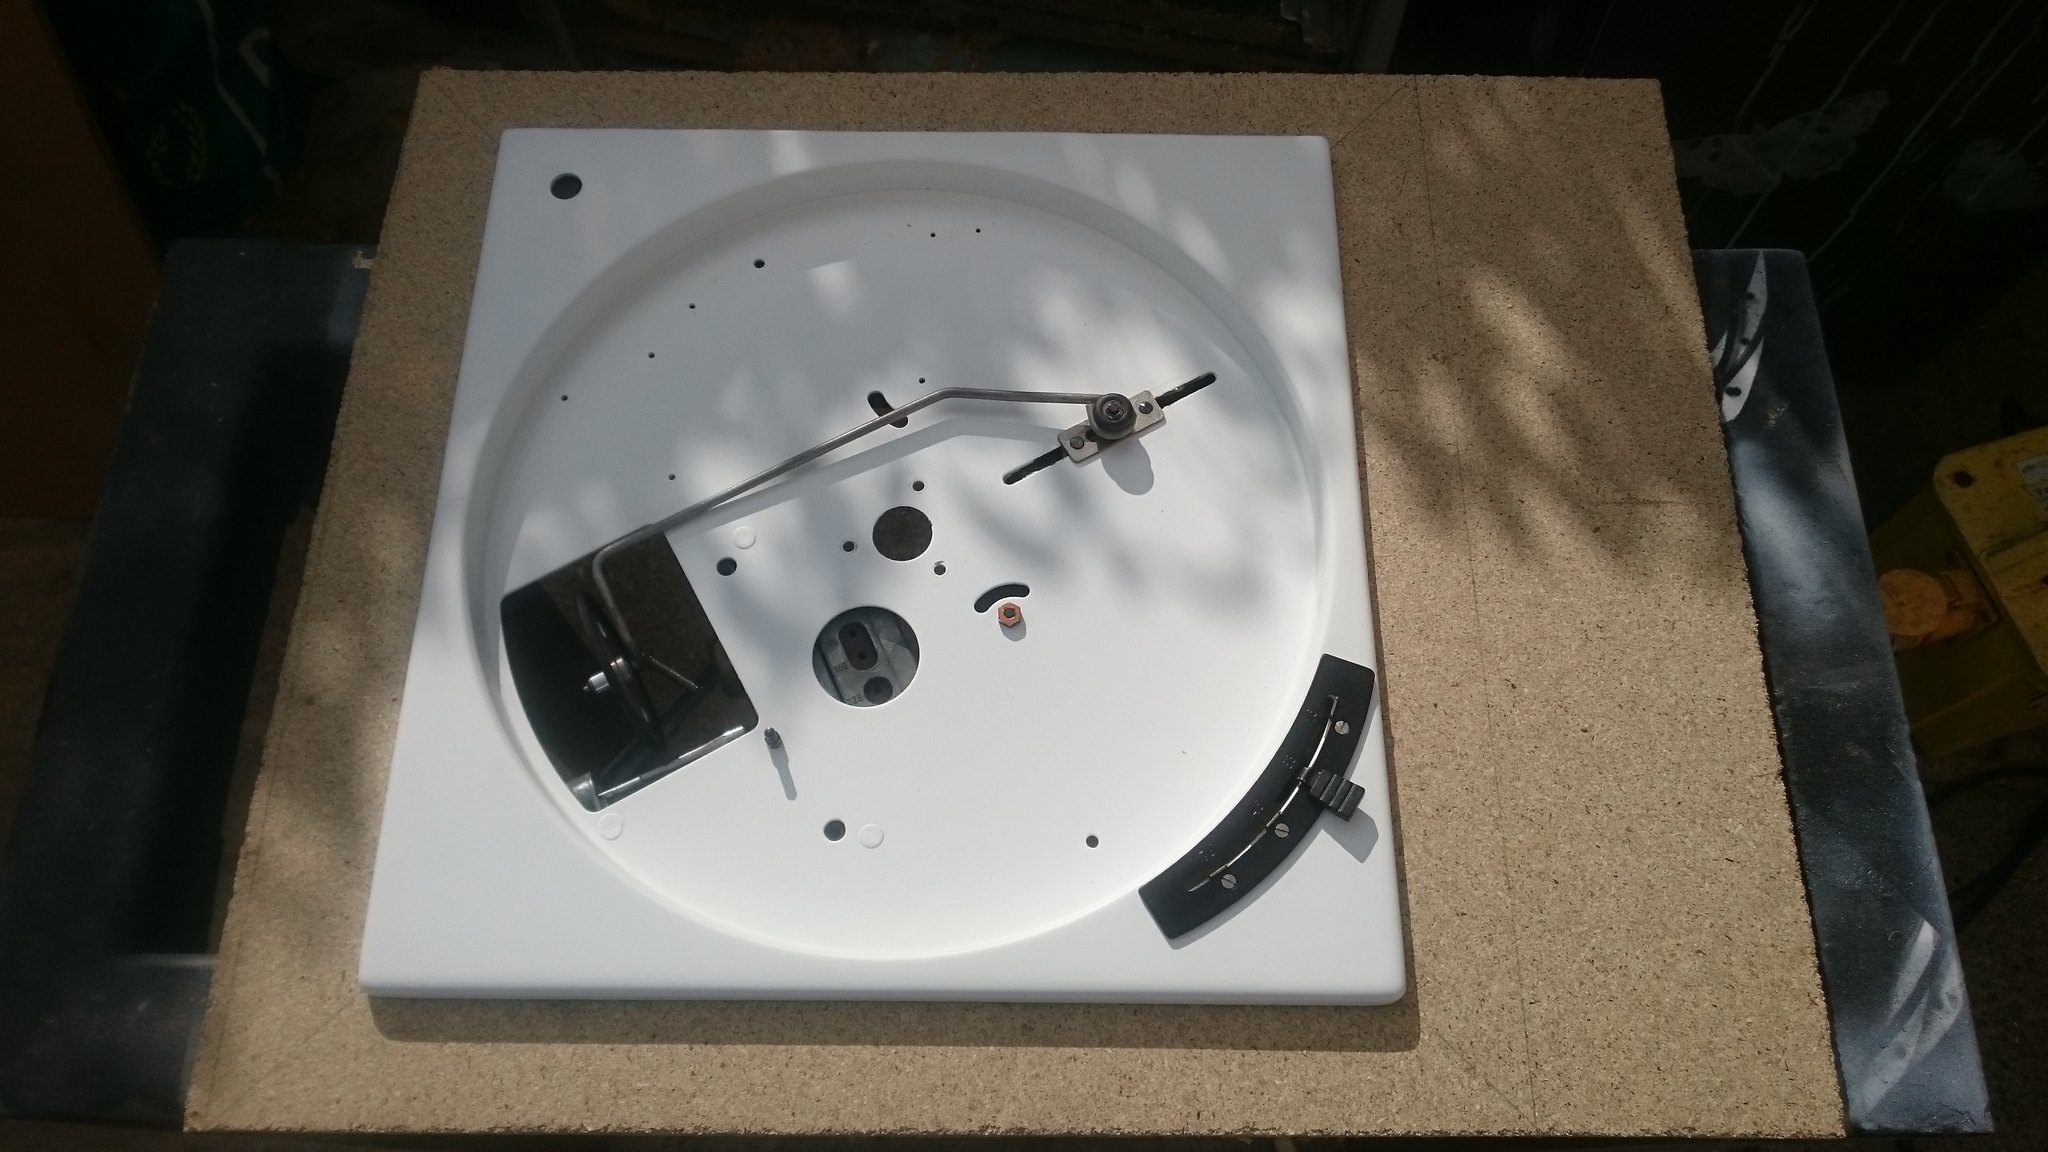
Now the gl59 is interesting as it was available at the same time as the 88, as an all in one version with an arm on it. Mine didn't have an arm, and I didn't want the one it should have had anyway. As such, the drivetrain is identical to the 88 in every way. identical platter, identical bearing which is actually a higher tolerance one than the ones in the 75 and the 99, identical motor with the cast in electrical connections instead of the shite block connector of the later models, and the metal idler and the idler arm with the 2 nuts instead of the one with the crap circlip fixing. this makes adjusting up the idler much easier.
this is it, sans platter
 Make your own g88
 by
anthony cresswell, on Flickr
Re: make your own g88
Posted: Tue Oct 02, 2018 1:35 pm
by Vinyl-ant
So. What to do with it.
The purists will not be happy in the slightest.
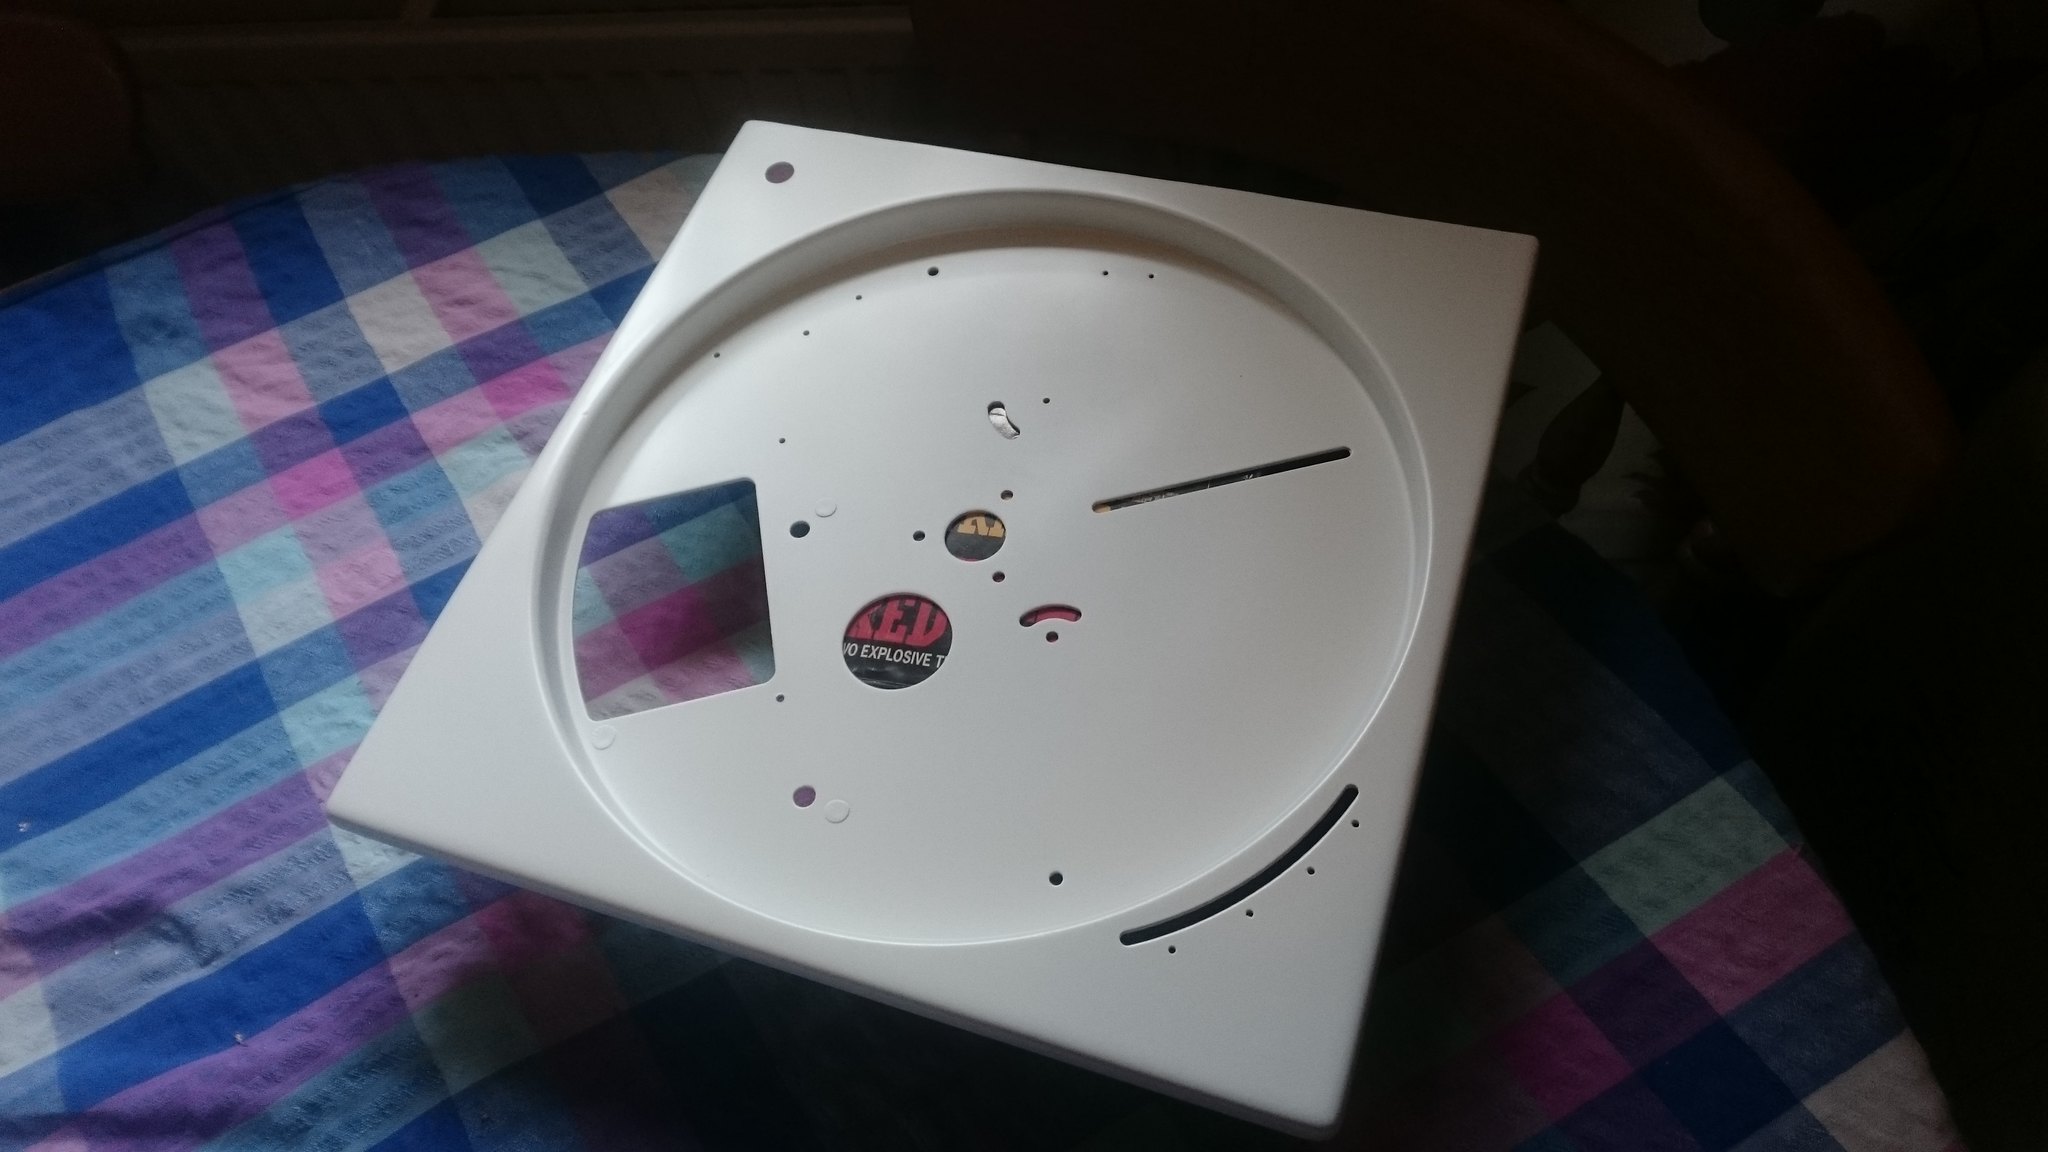
Usually i'd carve it up and make a type 2 out of it, but this time i did something else.
It still got carved up, but in a different way, i made it into a motor unit.
I remember someone did this years ago on the old wad forum, cant remember who, but it was a nice way to do things and i haven't seen one like it since.
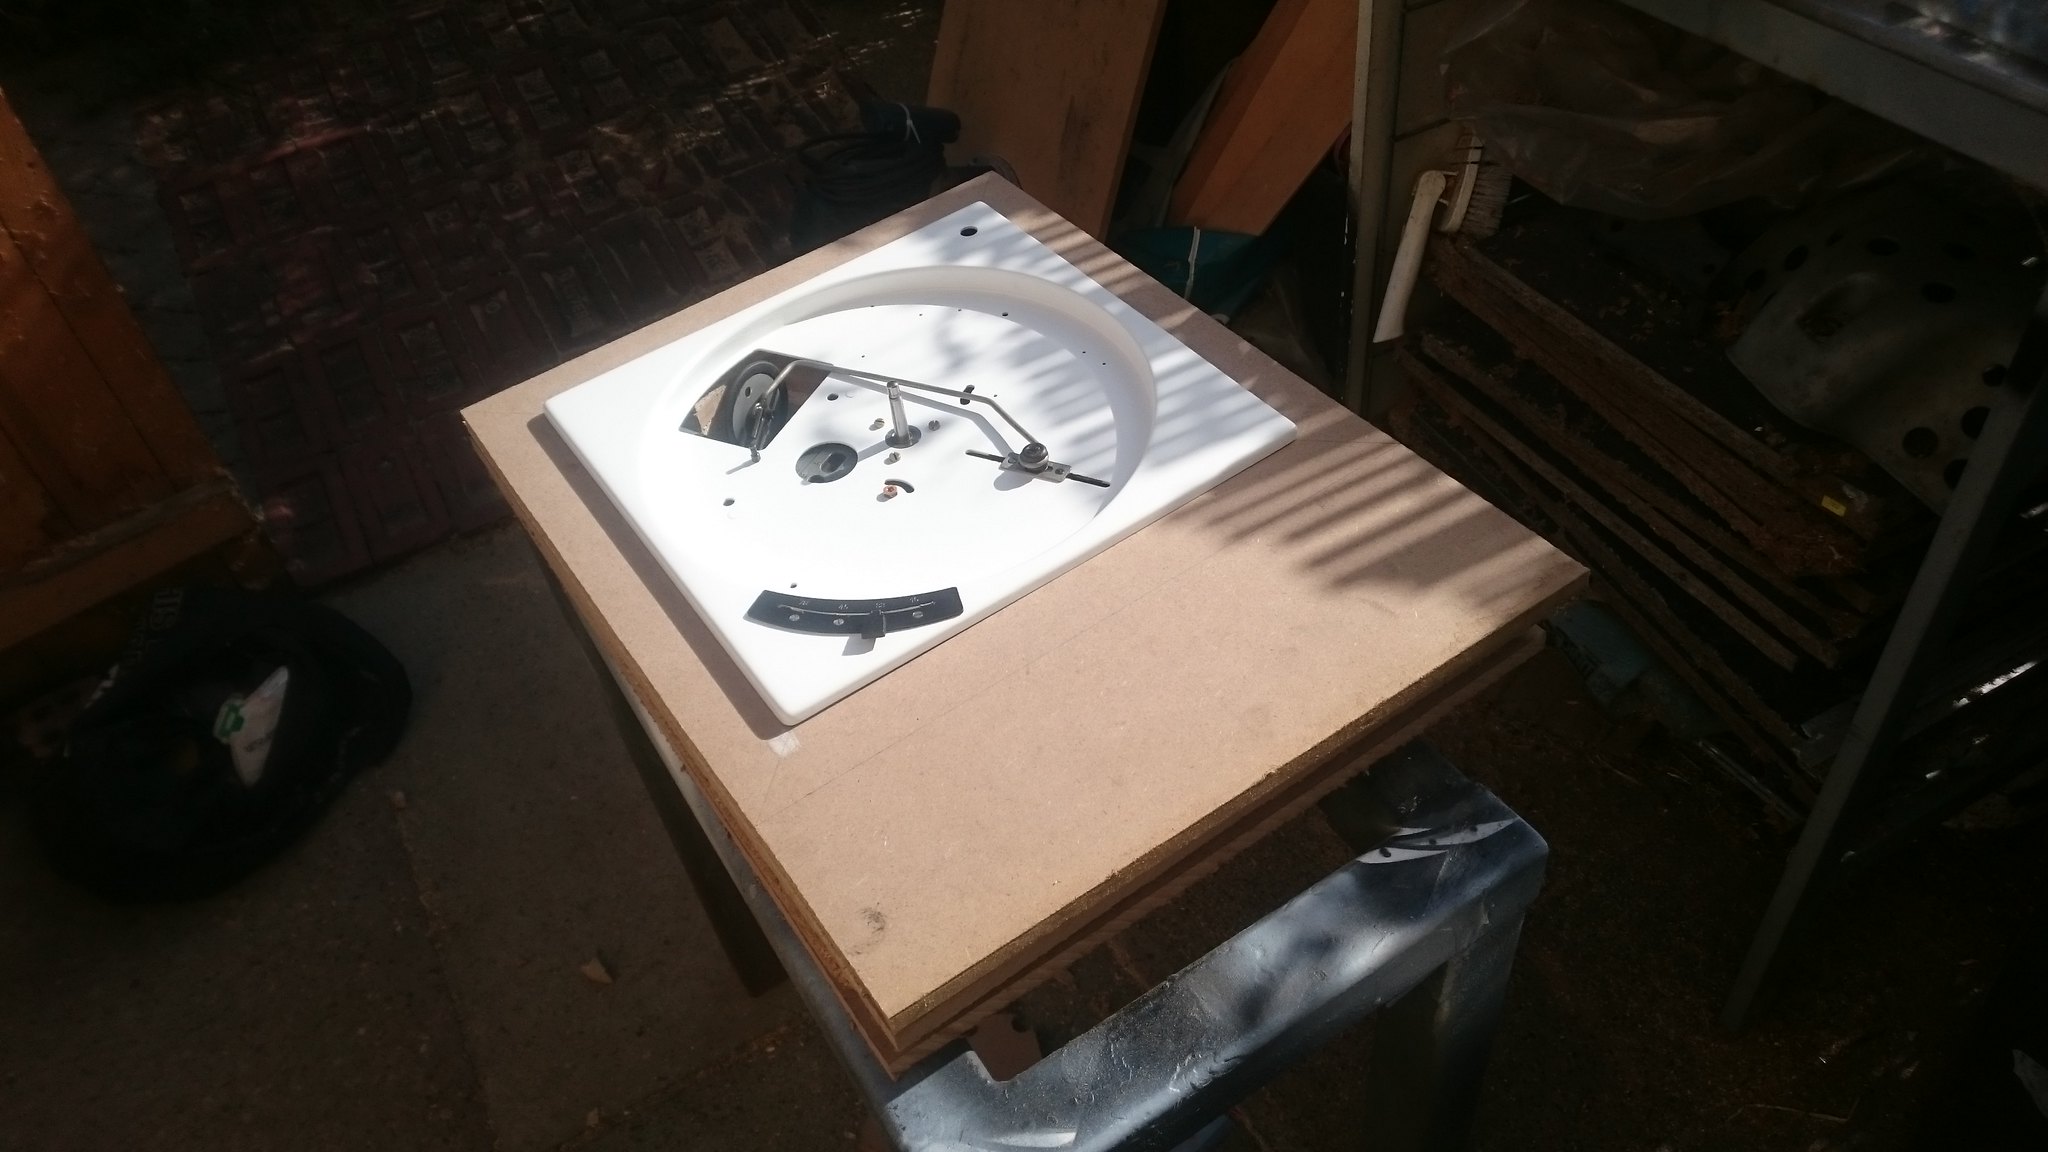
so i cut the side off then welded a piece of steel in to give it a lip matching the rest of the sides. then did a load of fettling with a file to give it a matching rolled edge.
once this was done i stripped the paint off the entire thing with rustins strypit and painted it. i initially painted it black but didnt like it, so i stripped it again and did it matt white.
 Make your own g88
 by
anthony cresswell, on Flickr
Re: make your own g88
Posted: Tue Oct 02, 2018 1:44 pm
by valvesRus
Vinyl-ant wrote: ↑Tue Oct 02, 2018 1:35 pm
I remember someone did this years ago on the old wad forum, can't remember who, but it was a nice way to do things and i haven't seen one like it since.
It was Phil (Pre65)
I think Andrew Ivimey ended up with it.
Re: make your own g88
Posted: Tue Oct 02, 2018 1:54 pm
by Vinyl-ant
the hole in the rear left corner is for a switch, the original linkages will not be used which removes some vibratory metal.
"buuuuuuuuuuut that means the idler will be in contact with the motor and platter all the time!" you may say. doesnt matter says me. ive never once seen an idler wheel for one of these that has a dint in it from being sat engaged all the time. not once. and i have built many lencos. its not an issue.
anyway, on to the running gear. The bearing was pulled apart and rebuilt, i did have to put the spindle in the lathe and clean it up with some polishing compound as there was something on it that wouldnt come off. some old rock hard grease or something. did it that way so that the surface was not damaged by something abrasive.
back together and sorted, it runs exactly as it should.
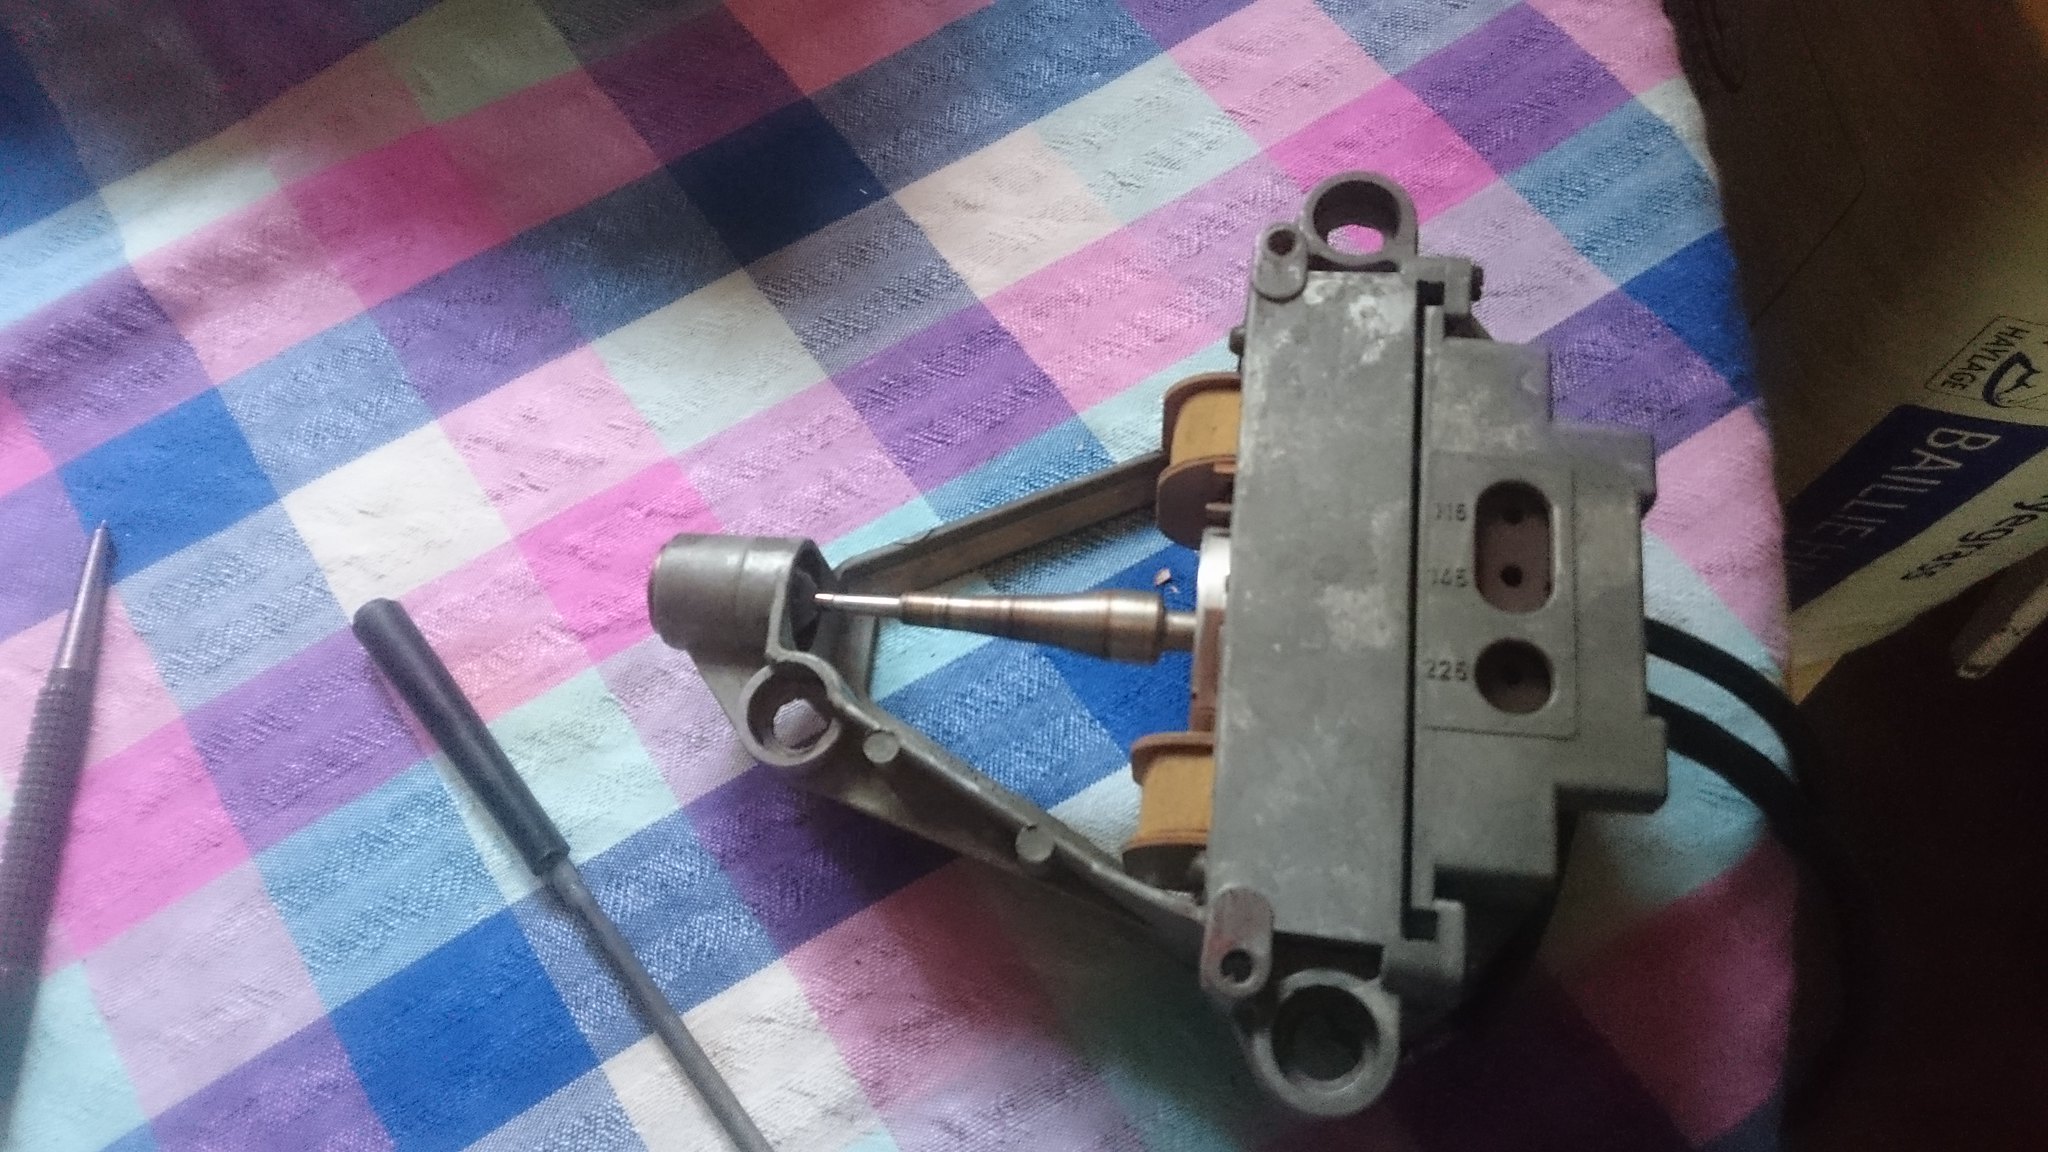
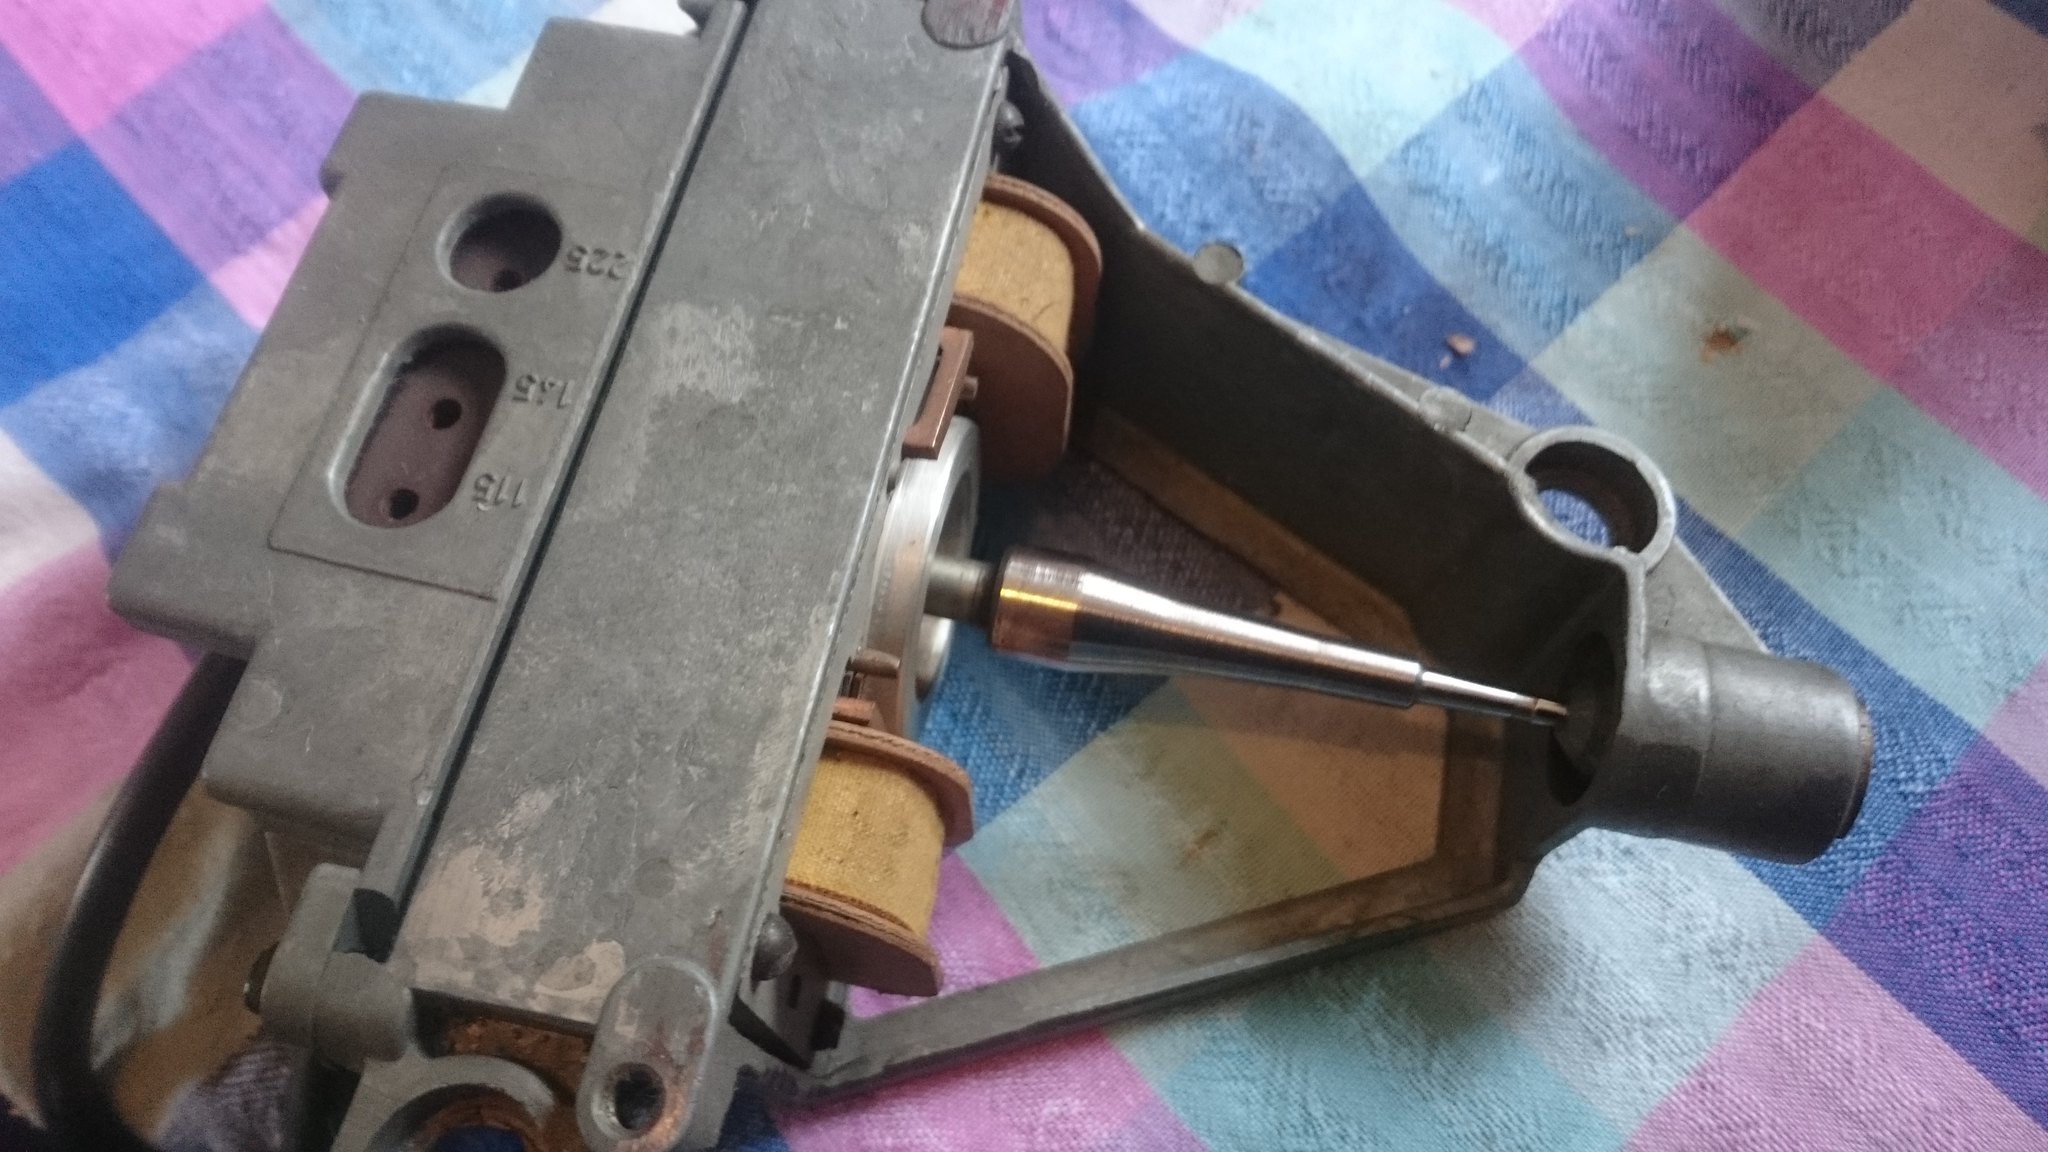
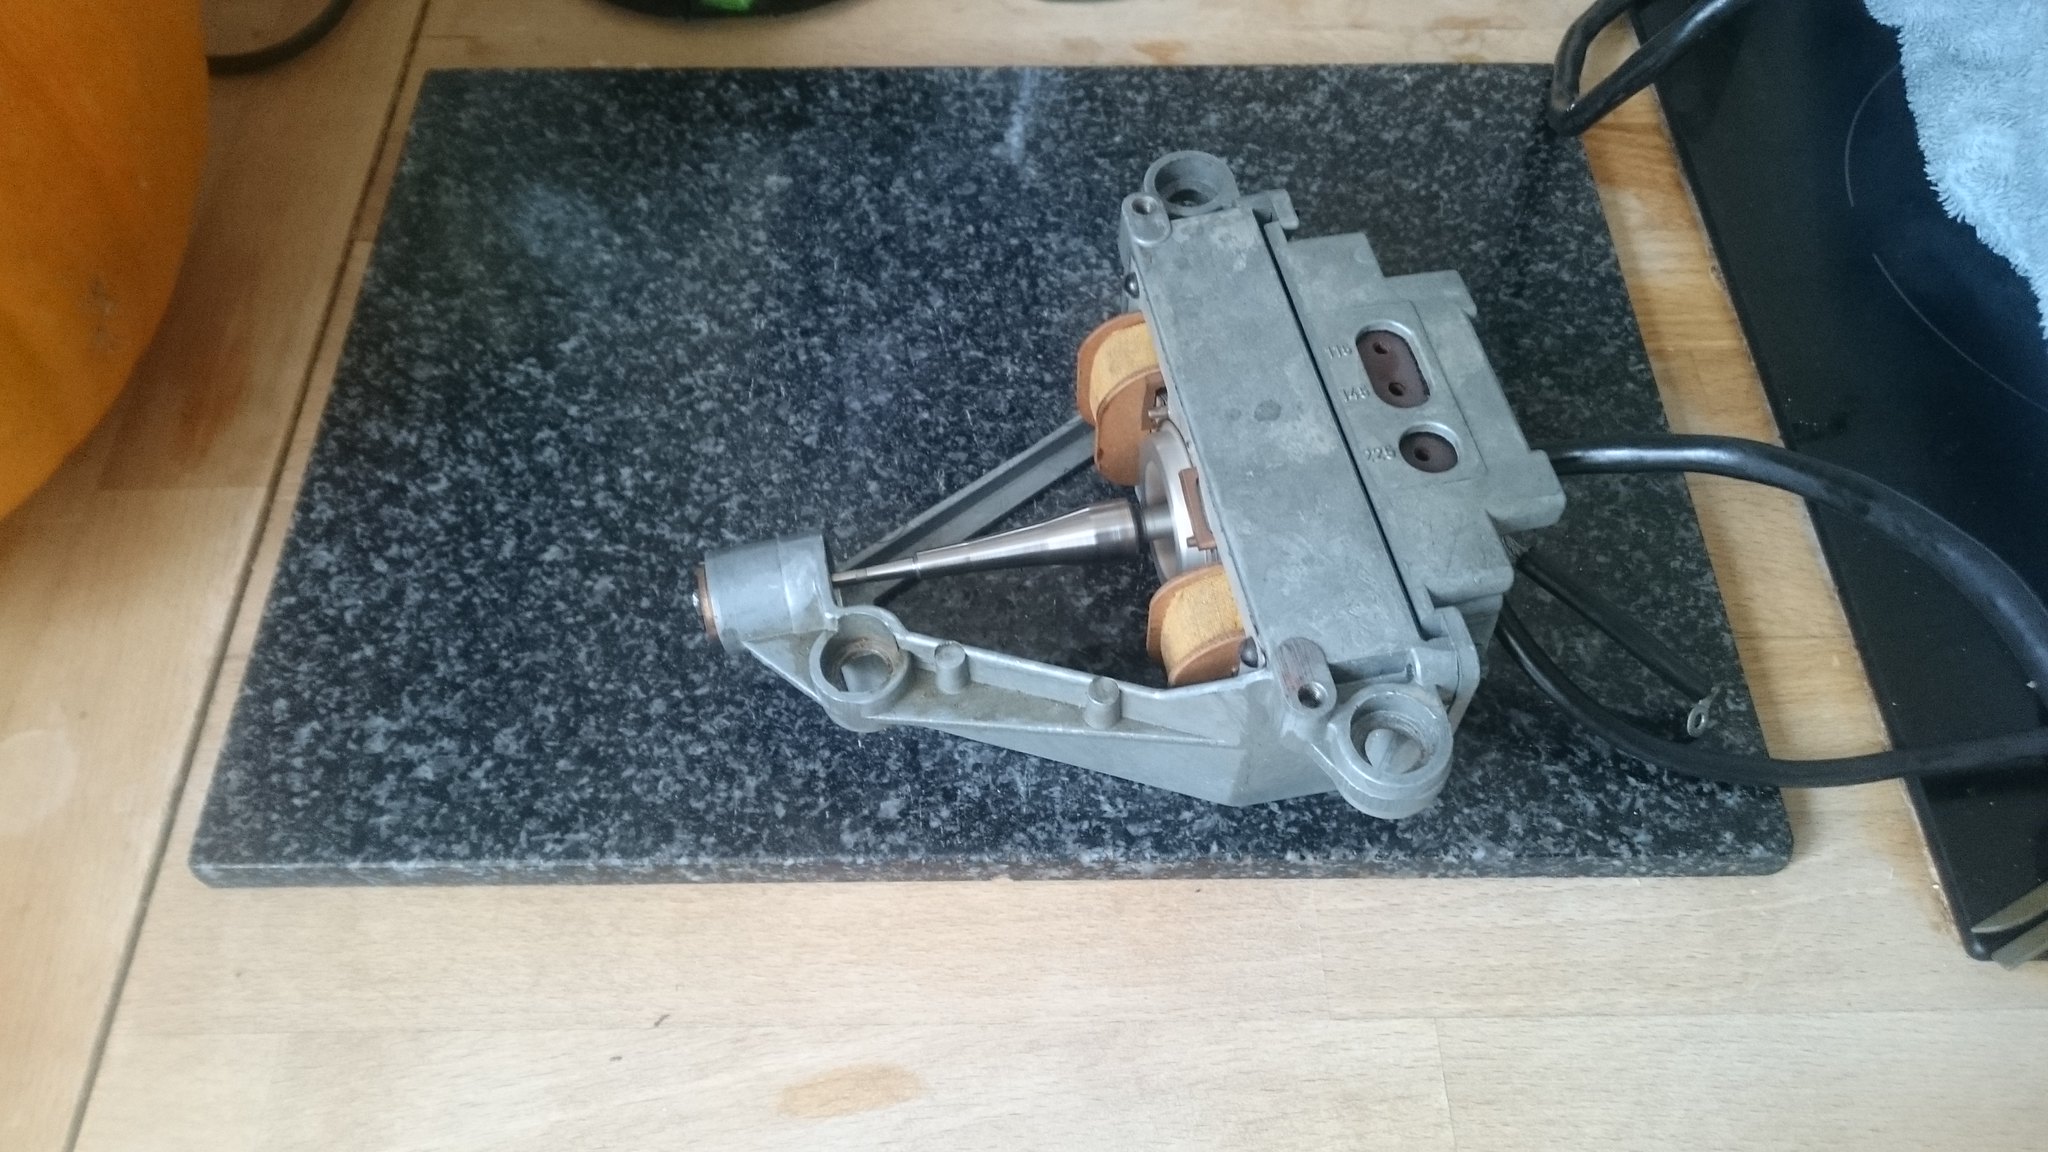
onto the motor, it was completely stripped as it was in a shit state
 Make your own g88
 by
anthony cresswell, on Flickr
The spindle was corroded and it was pretty much seized. I did the same as i did with the bearing spindle, and put the rotor in the lathe then used polishing compound to get the spindle back to spec. i didnt want to use abrasives on it, and the compound got rid of all the corrosion in a nice gentle manner.
 Make your own g88
 by
anthony cresswell, on Flickr
The spark surpressor cap had had it too
 Make your own g88
 by
anthony cresswell, on Flickr
its definitely not supposed to look like that.....
Re: make your own g88
Posted: Tue Oct 02, 2018 2:01 pm
by Vinyl-ant
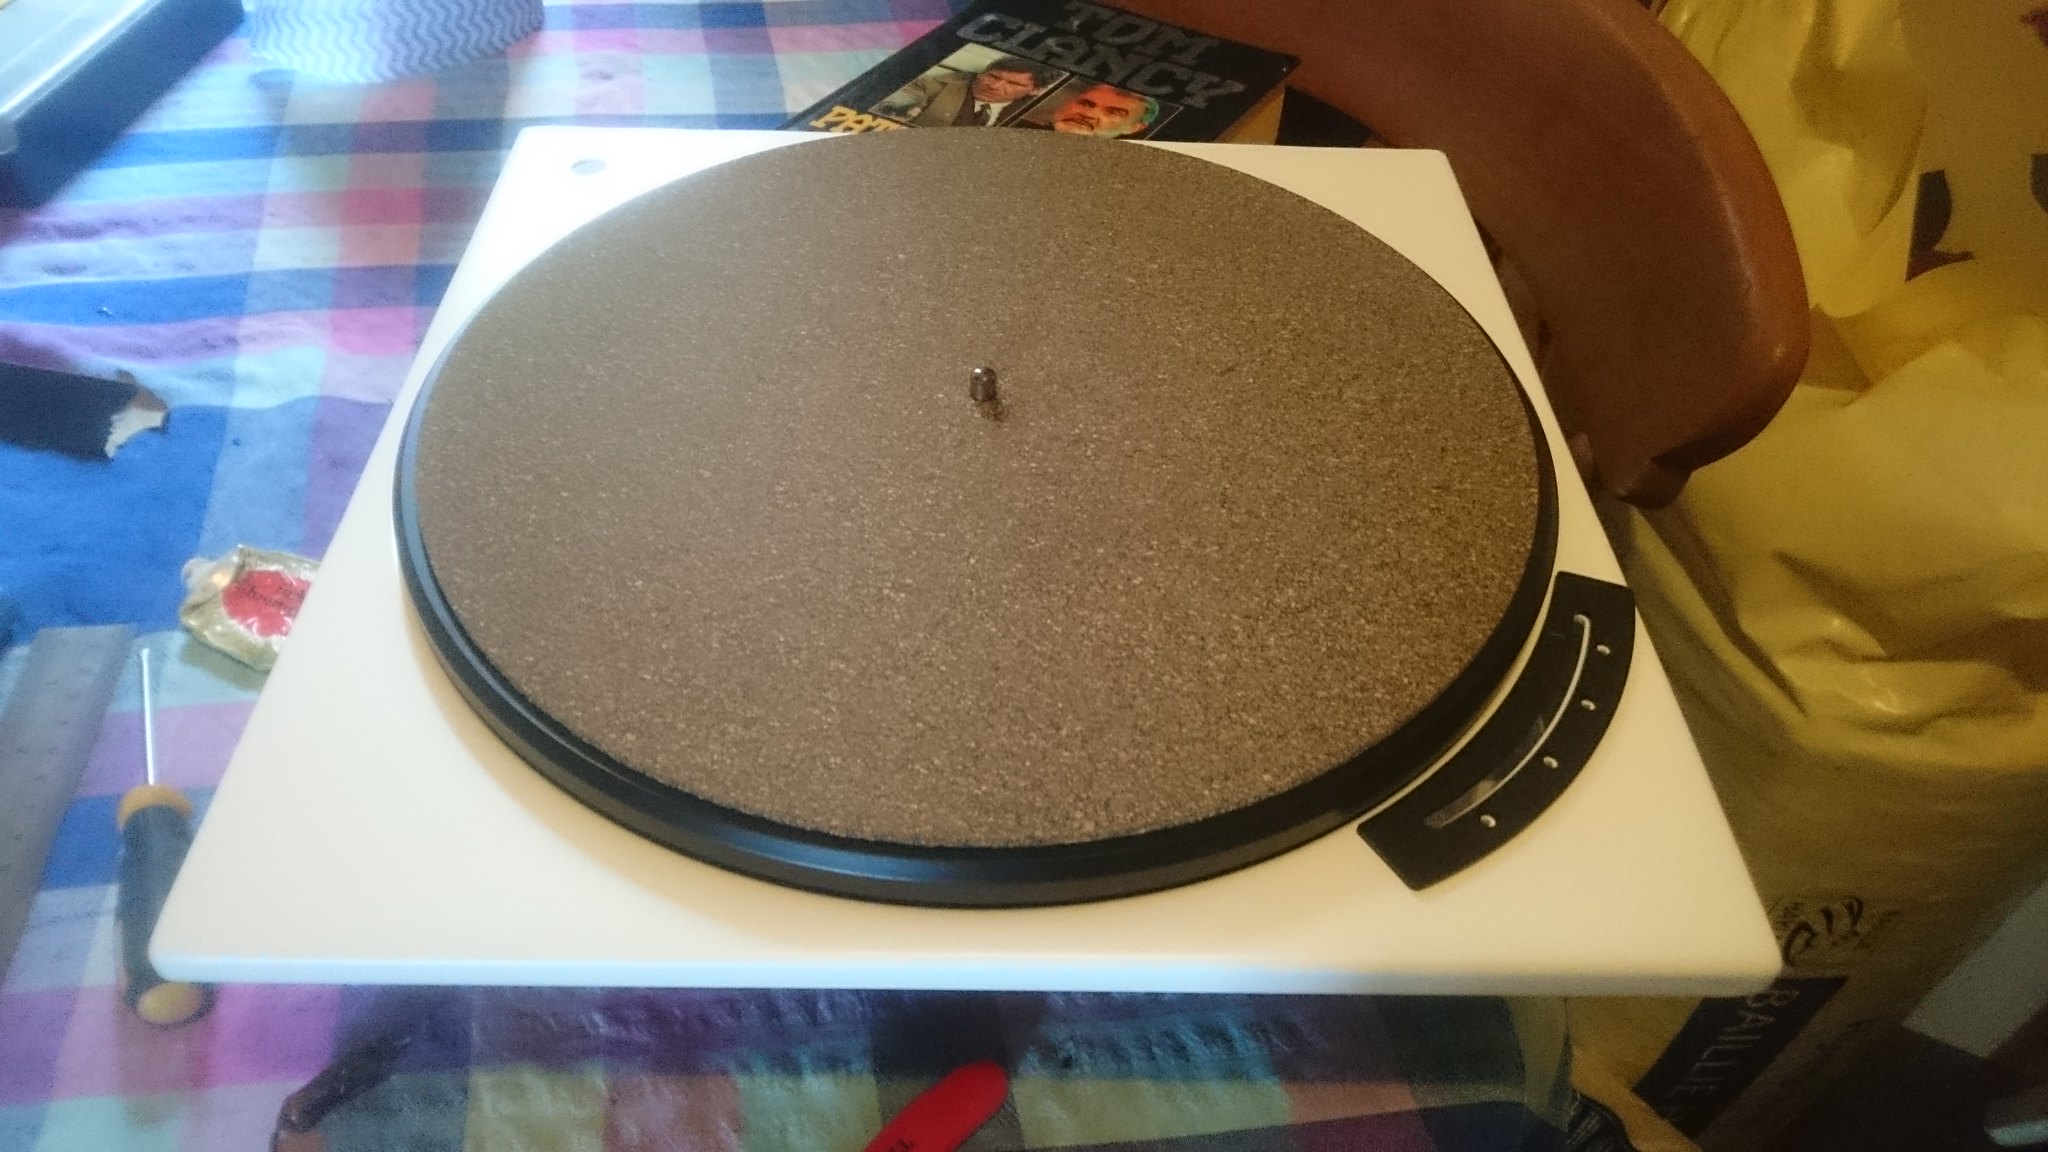
next, once the motor was back together, the nose bearing was set by ear. put it on a flat hard surface (granite chopping board in this case) and then run it. twiddle the nose bearing screw until it goes quiet. then do up the locknut. simple
 Make your own g88
 by
anthony cresswell, on Flickr.
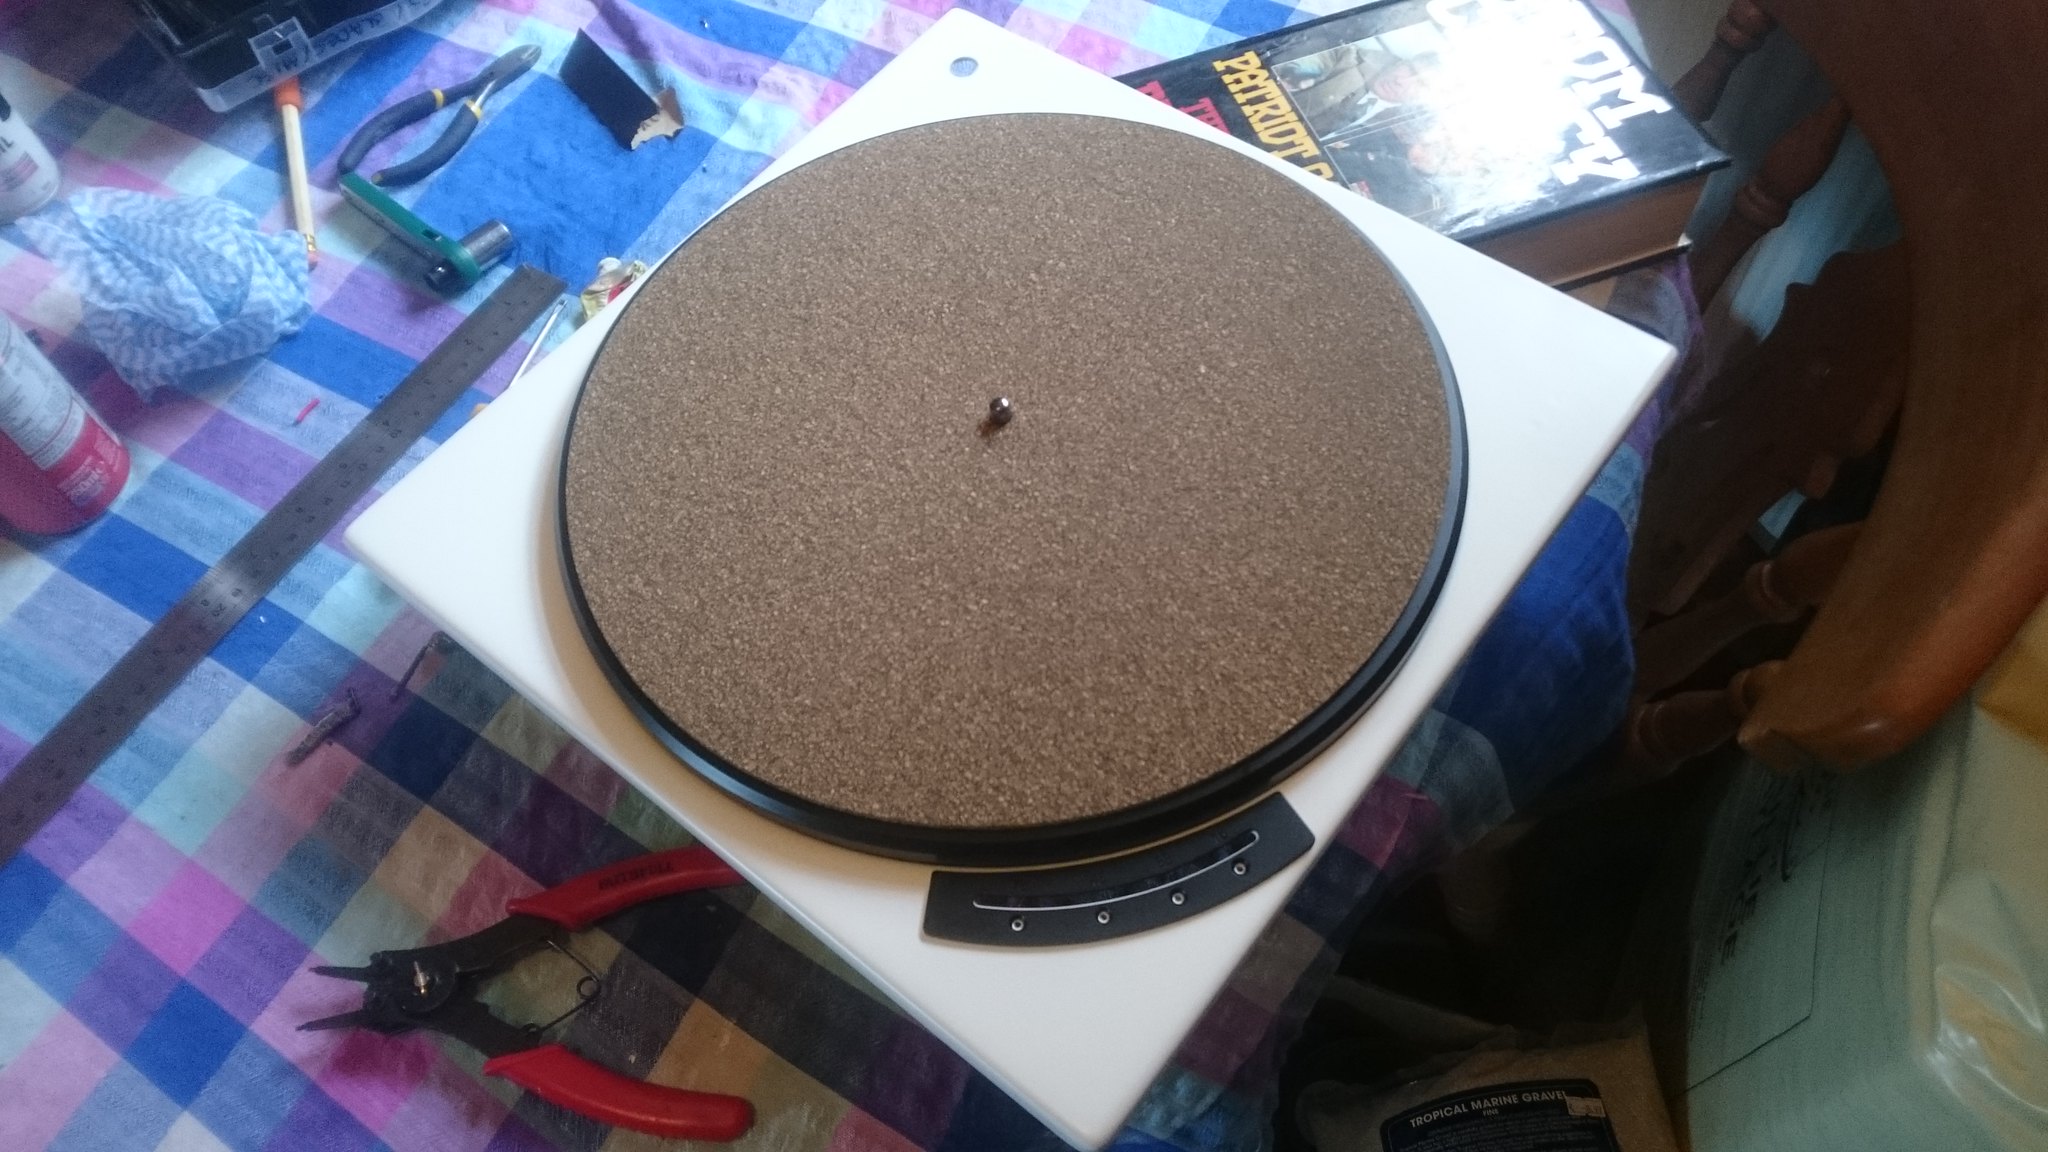
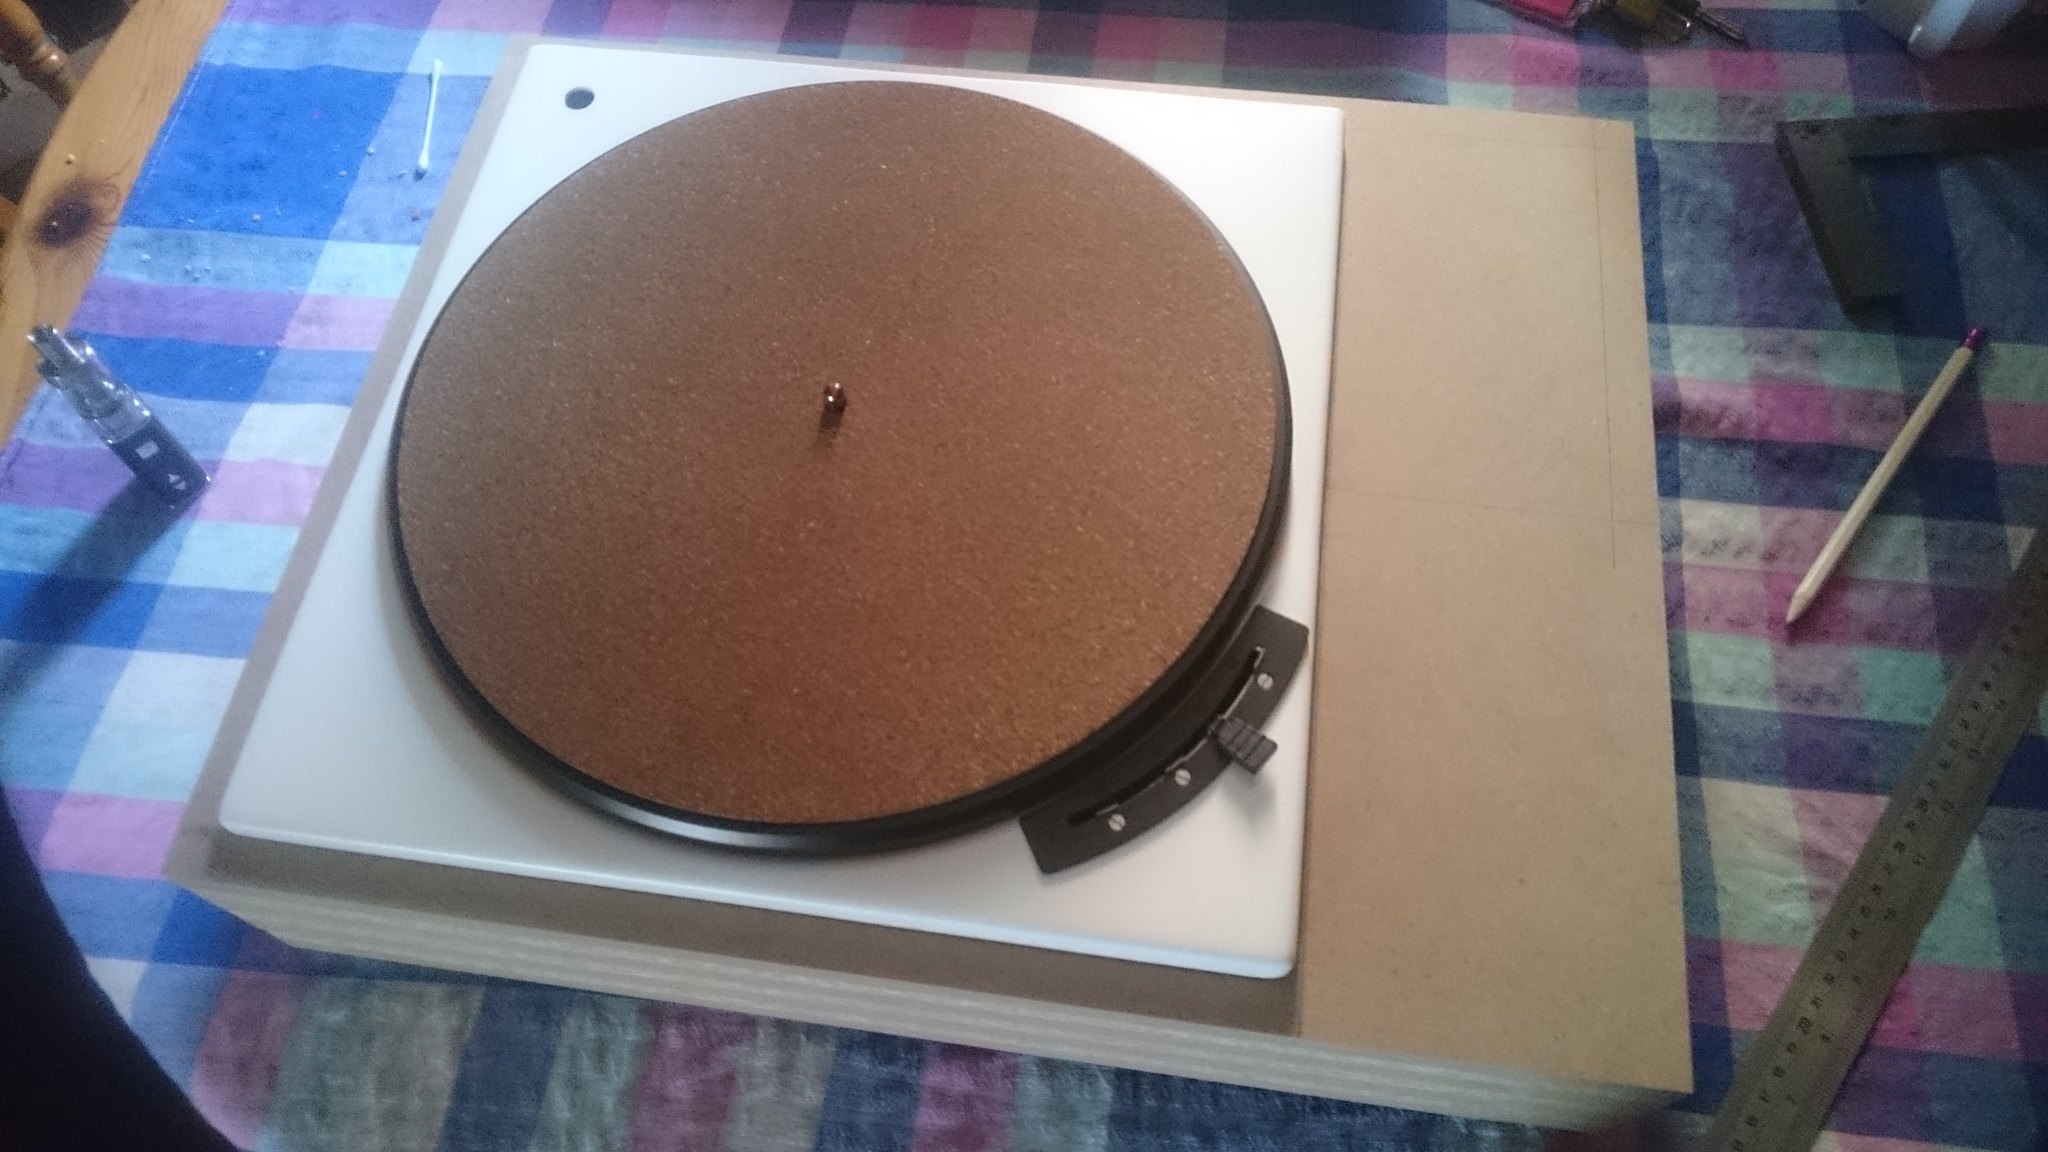
Then fitted the bearing and platter which i painted black, and borrowed a mat off something else.
 Make your own g88
 by
anthony cresswell, on Flickr
 Make your own g88
 by
anthony cresswell, on Flickr
to be continued
Re: make your own g88
Posted: Tue Oct 02, 2018 2:10 pm
by Chunk McDaniel
Looks amazing. Looking forward to the next stage.
Re: make your own g88
Posted: Tue Oct 02, 2018 2:45 pm
by Dr Bunsen Honeydew
So if you did this for someones else as a project how much would it be.
Re: make your own g88
Posted: Thu Oct 04, 2018 5:11 pm
by Vinyl-ant
done some more work on it today.
should have been doing other things, but i felt so crap when i got up that i didn't want to go near other peoples jobs in case i cocked something up.
this was mostly donkey work, so it was difficult to do any damage....
so it now has the beginnings of a plinth, made in my usual style and materials.
also got it all built up so that the plinth cutout could be cut to fit the component positions
one layer down
 Make your own g88
 by
anthony cresswell, on Flickr
and then a pic when all of them were done, and some very odd light conditions..
 Make your own g88
 by
anthony cresswell, on Flickr
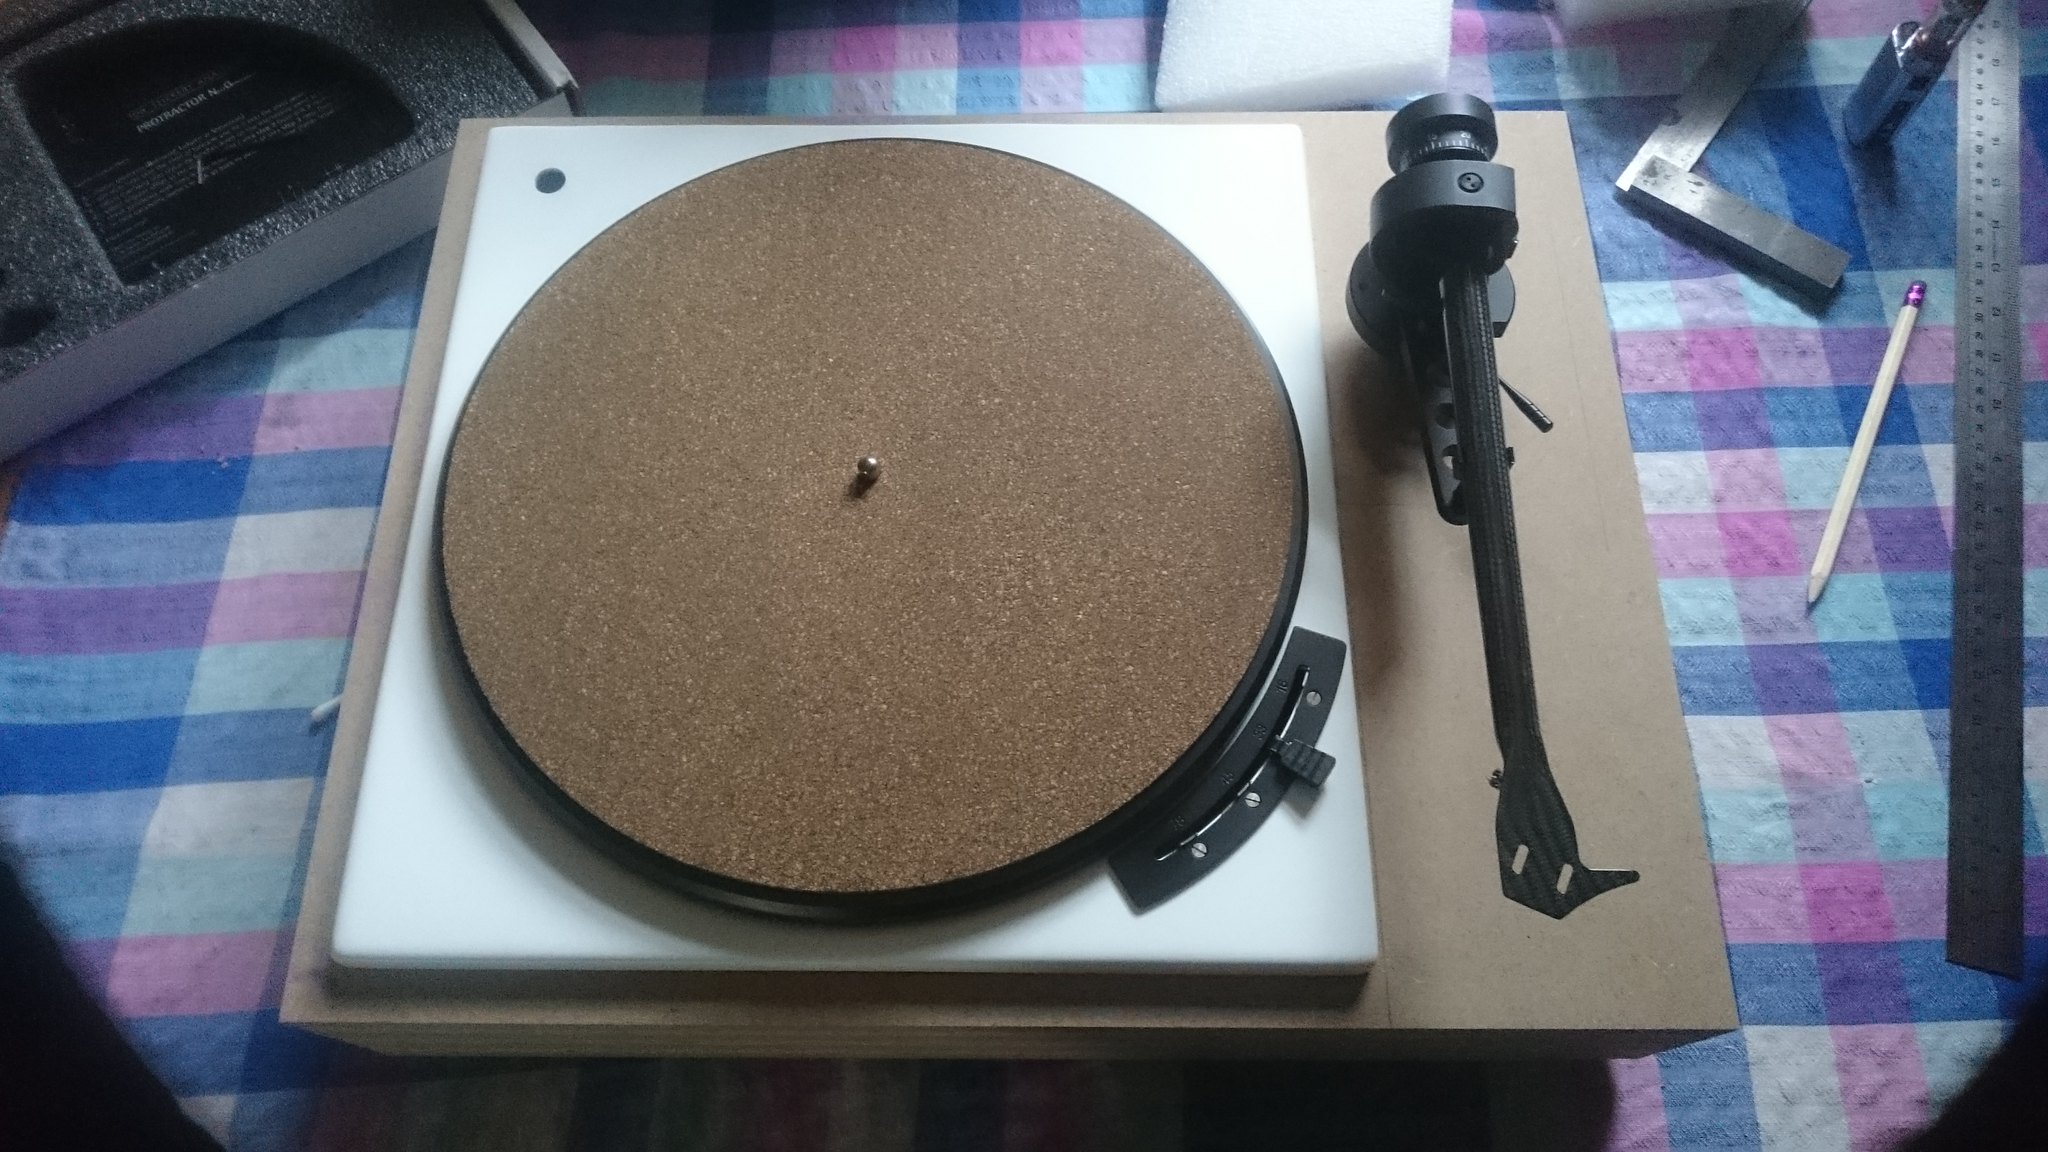
I then mocked it up with the project 9cc arm i bought. Ive only ever bought 2 tonearms new, and strangely, both of them have been project 9's. i bought one of the very first 9s in the country back in 2000 ish when henley designs had just started importing the project range, that one was the alloy arm tube one, and this one, the 9cc has a carbon fibre arm wand.
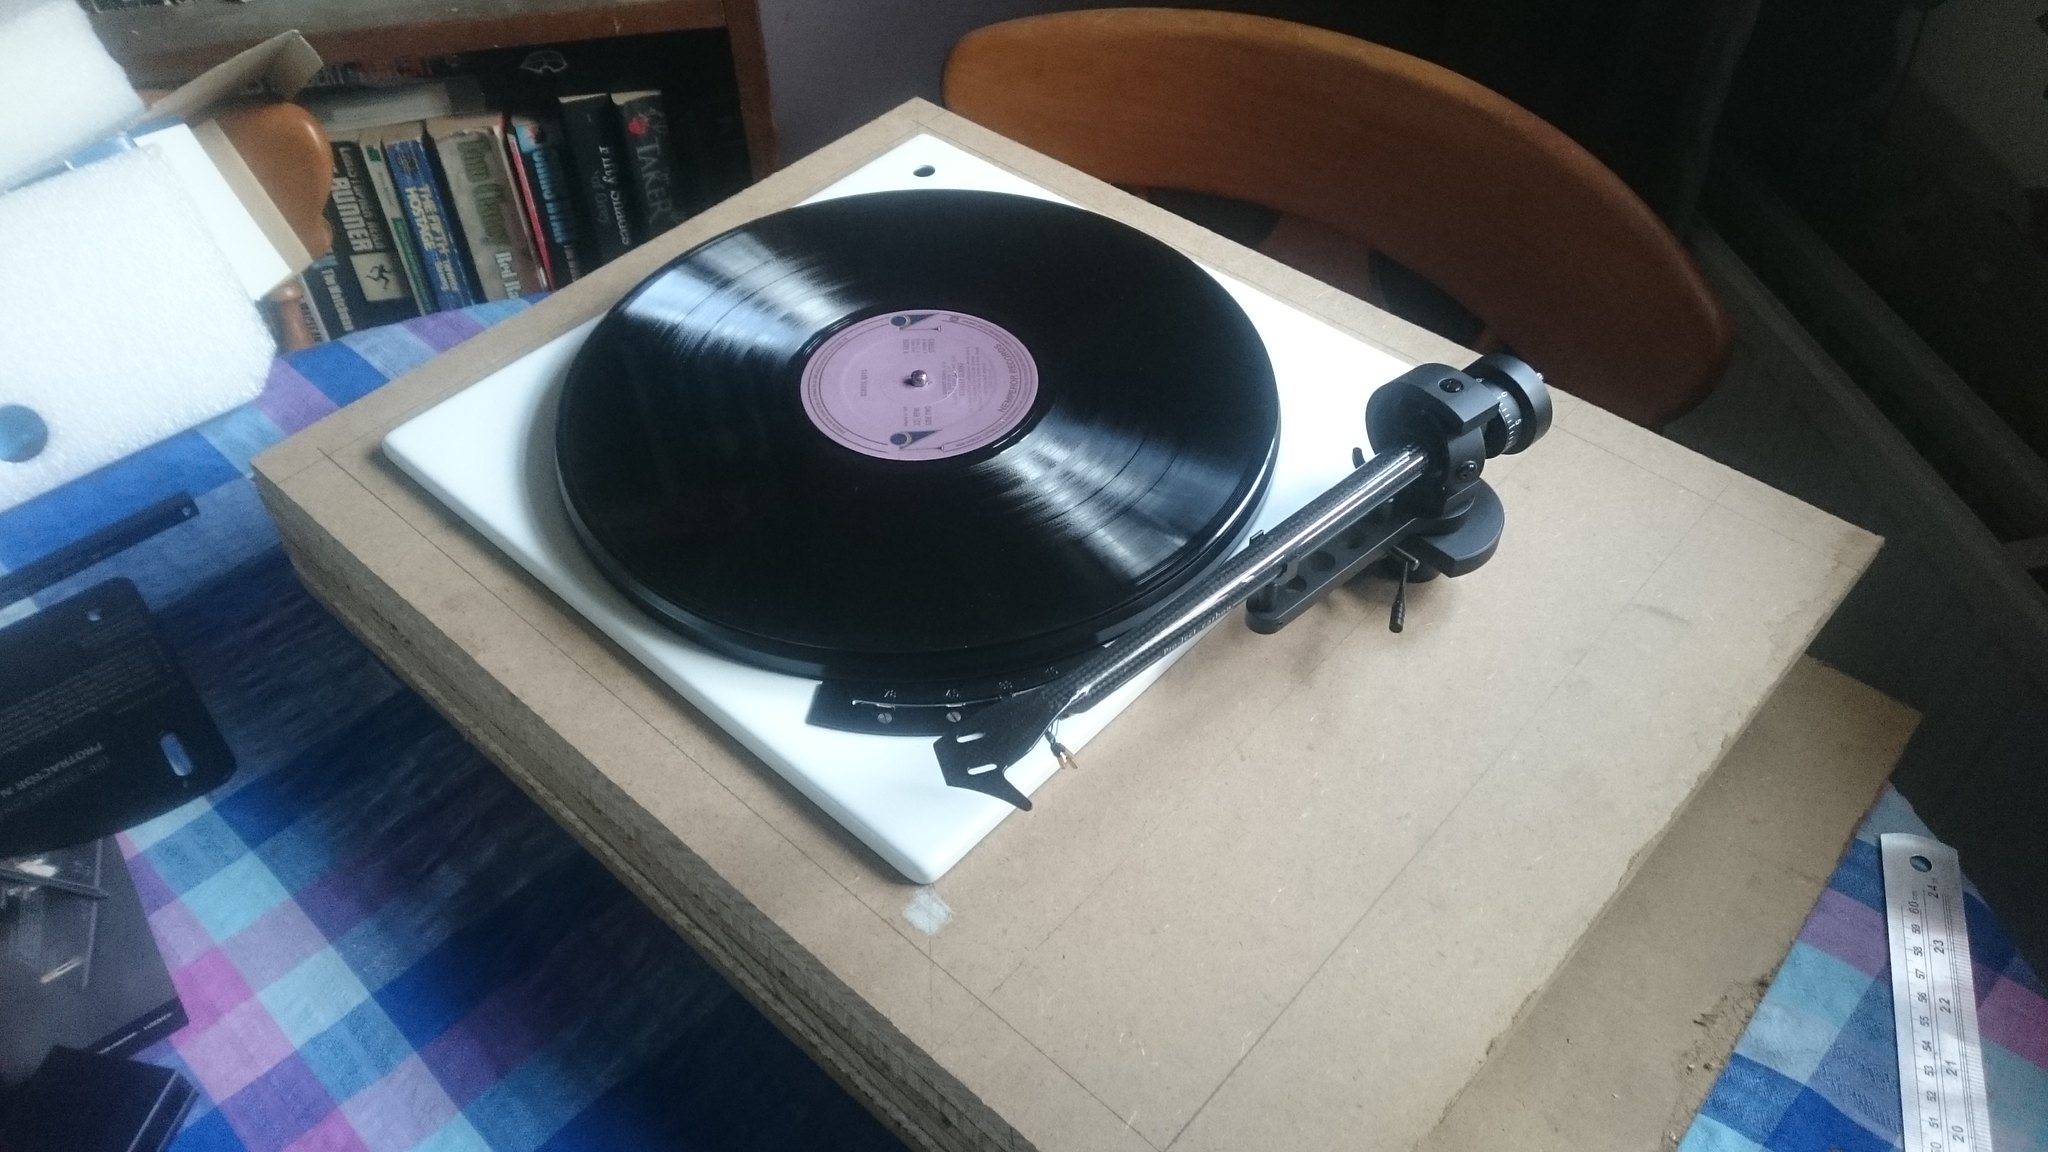 Make your own g88
 by
anthony cresswell, on Flickr
its actually in the correct position, made very easy by using a dr feickert (is that how you spell it?) alignment protractor. if you havent seen one, it has a sliding ruler for measuring the s/p distance when setting up a cart that has a spike that comes down to mark the tonearm bearing centre, so its perfect for marking up for tonearm fitting.
 Make your own g88
 by
anthony cresswell, on Flickr
you can see on this pic where the plinth will be cut to, making it the regulation 18" width.
to be continued
Re: make your own g88
Posted: Sun Oct 07, 2018 3:43 pm
by Vinyl-ant
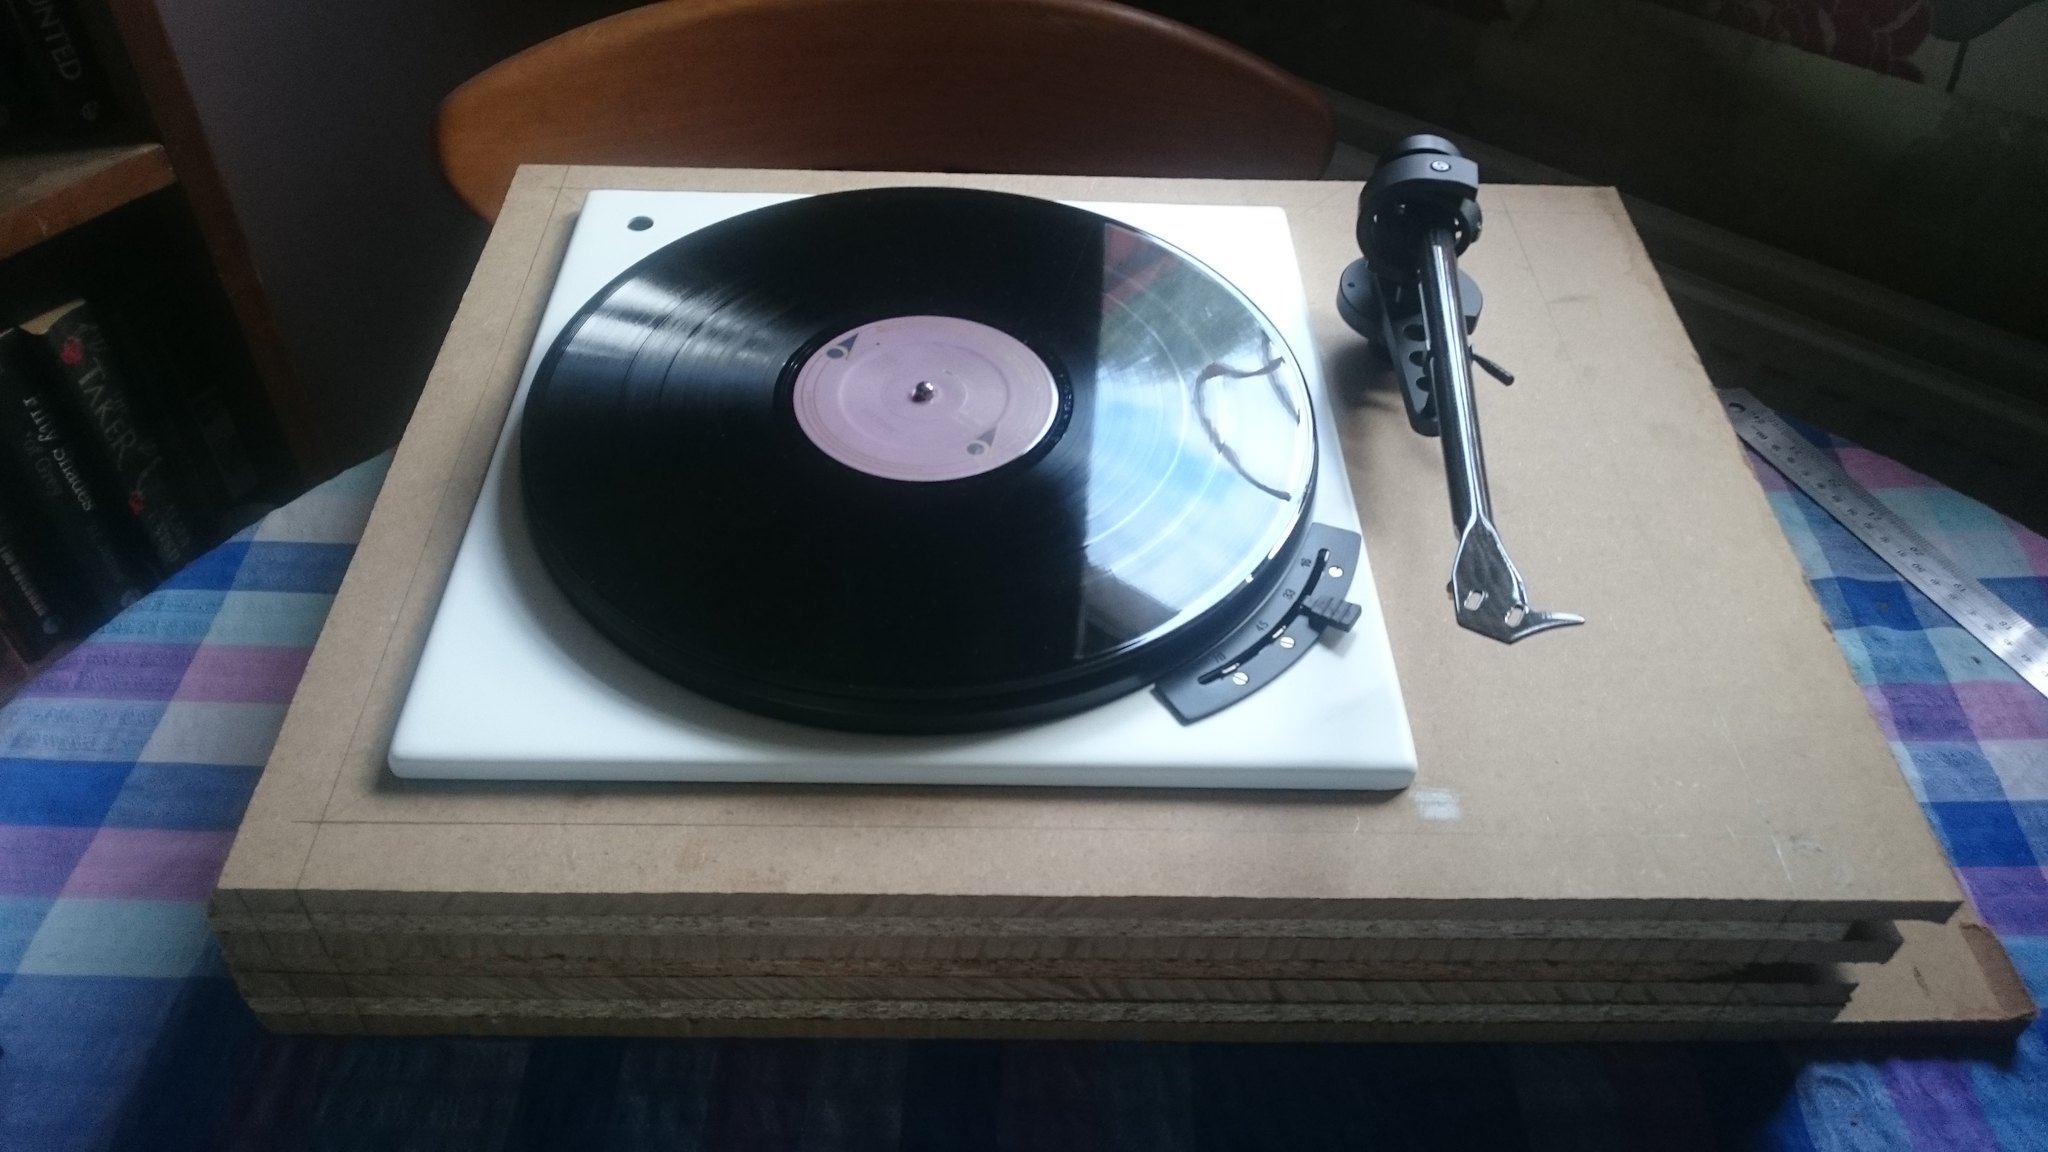
got some more work done on it, plinth is now glued and trimmed to size
 Make your own g88
 by
anthony cresswell, on Flickr
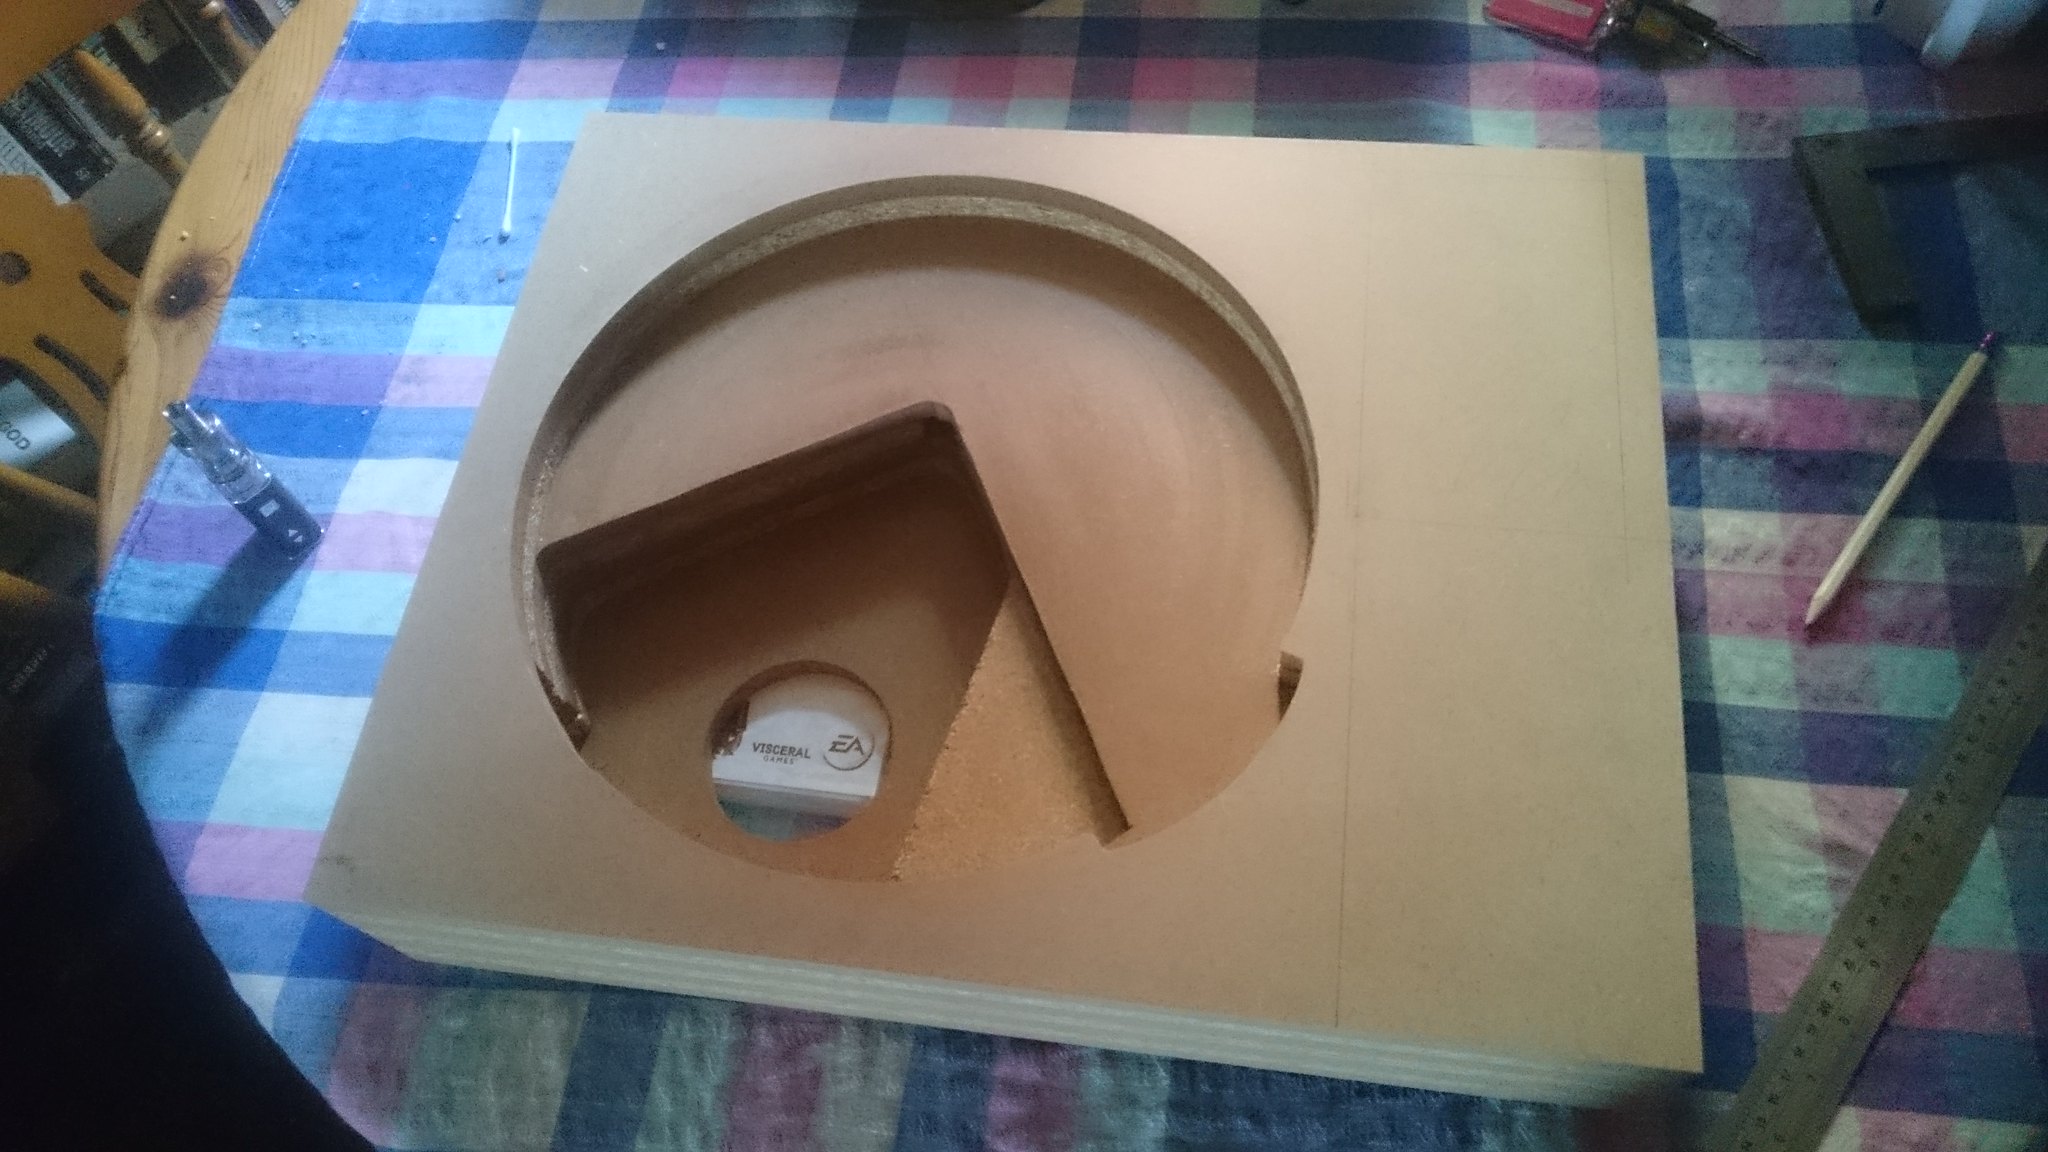
the cutout for the arm board is also marked up
 Make your own g88
 by
anthony cresswell, on Flickr
this will be done so it can accommodate the project arm at 212mm s/p distance, and anything else i have here such as the audio technica at1100 at 225mm s/p, the rega r200 at 222, or at a push, the karmadon arm at 270 mm s/p.
and its a fairly compact package at 18" wide by 14 1/4" deep
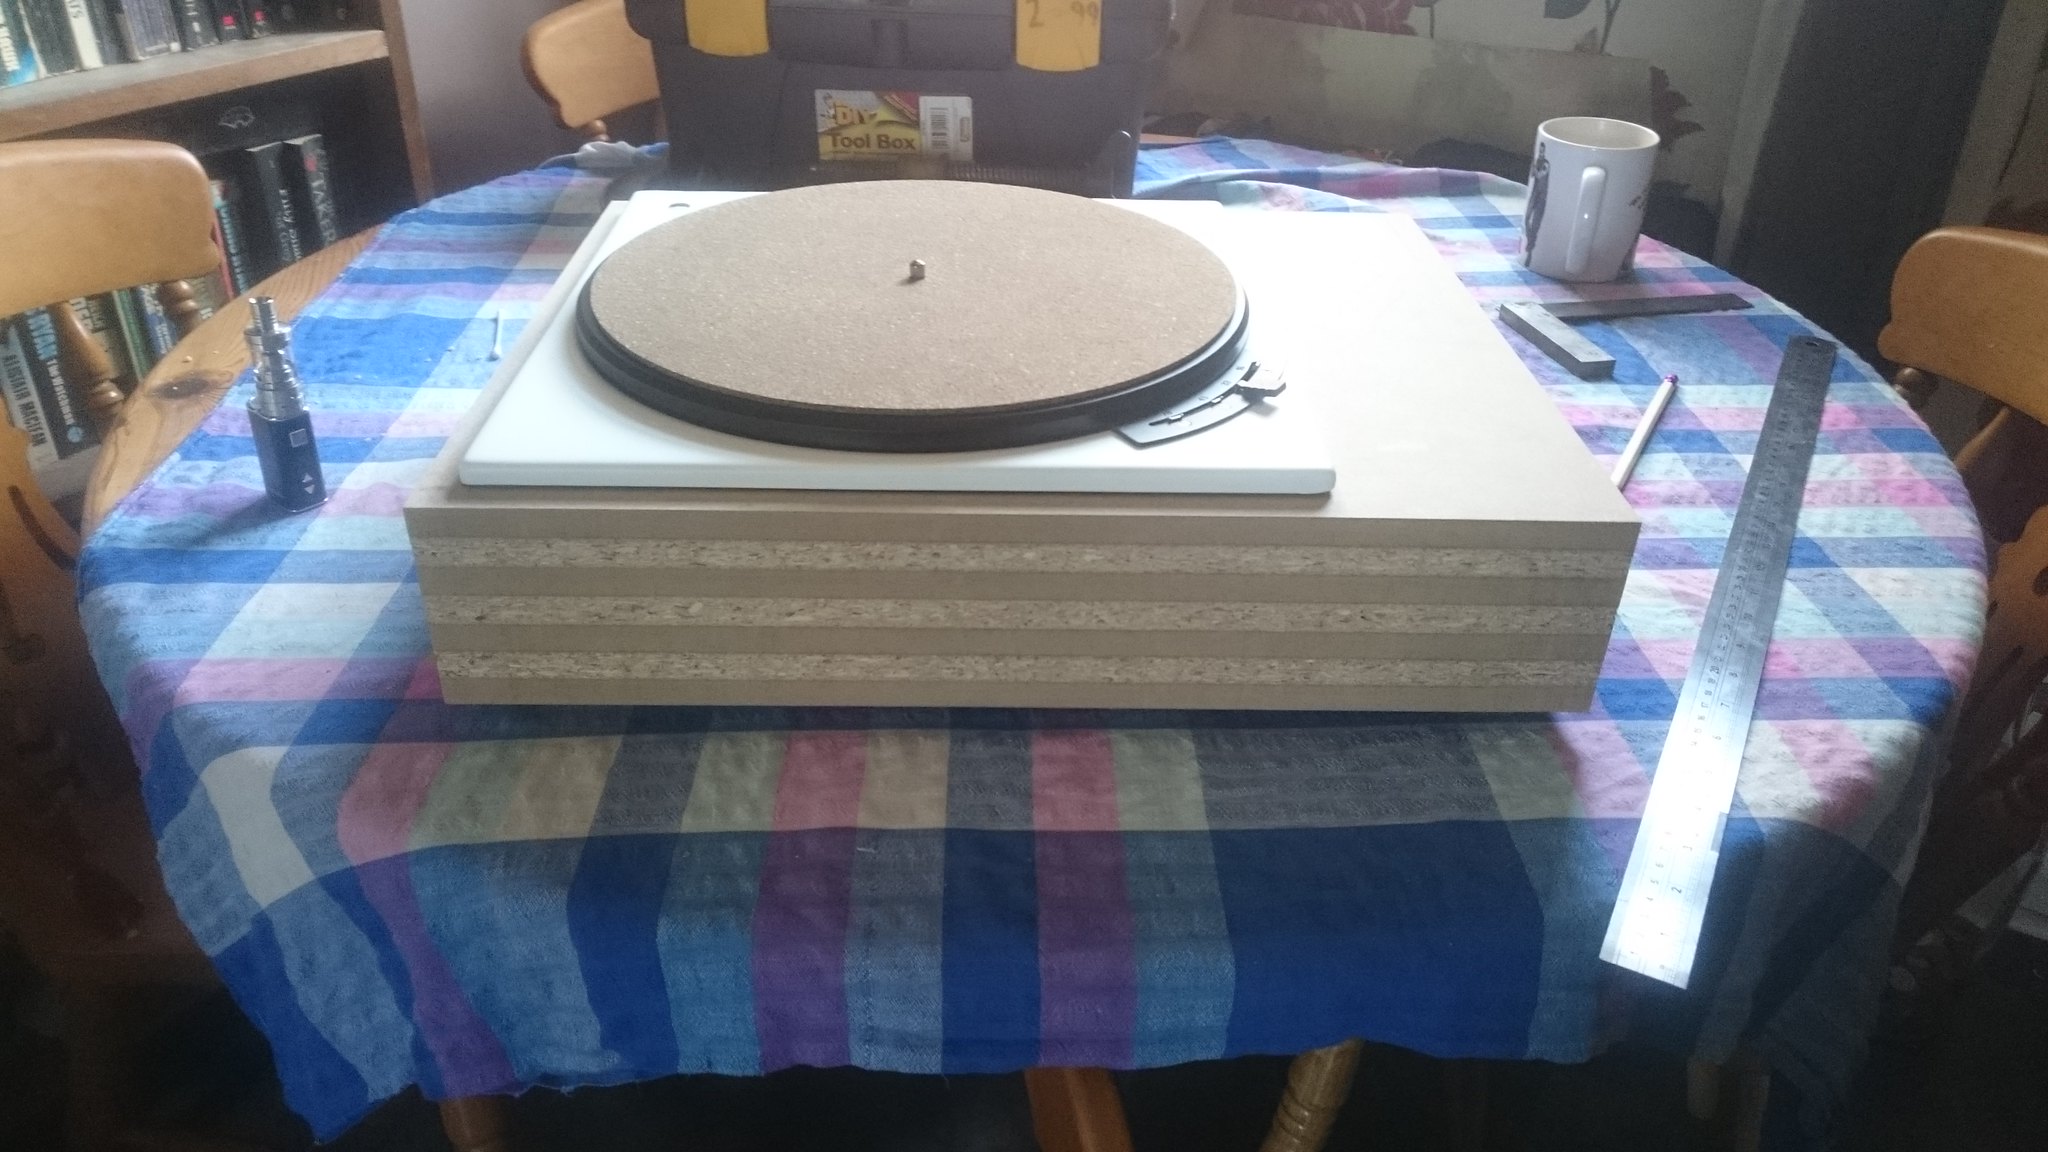 Make your own g88
 by
anthony cresswell, on Flickr
it will be finished in the same way as the g99 i did for richard with a walnut veneer on the sides and a black painted top deck to contrast with the white chassis. arm board will be veneered on the top face to break up the black.
 Make your own g88
 by
anthony cresswell, on Flickr
the arm will sit with the headshell in line with the front of the chassis.
to be continued
Re: make your own g88
Posted: Sun Oct 07, 2018 4:03 pm
by Vinyl-ant
The arm board will have to be recessed into the plinth by quite abit in order to be able to get the project arm low enough to make the vta adjustment usable, as it is quite a tall arm. The cutout will need to be larger too to clear the arm rest. Will take some headscratching to get it to look right.....